Content
Children love fiddling with buttons. Games with them can be divided into several types. With the smallest ones, you can simply lay them out in rows or decorate cardboard blanks. Older children can be asked to lay out a pattern and make a kind of mosaic. With older children, you can conduct various math activities using buttons as a visual aid.
Activities for kids
Now everything is in order. If you have a sufficient number of different buttons accumulated at home, do not rush to throw them away. It's luxurious game material. Classes with them develop children’s imagination, imaginative thinking and fine motor skills. But if your child begins to put them in his mouth or tries to put them in his nose, then such games should be postponed until a later time. The baby should play with small objects under adult supervision.
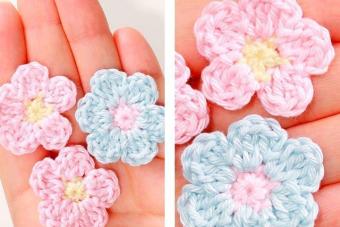
Buttons attract kids with their variety of colors, sizes and shapes. To begin with, you can simply arrange them by color and size. You can use disposable plates for this. The next step might be to lay out the simplest geometric shapes. Further - more difficult. You can use this material to create various mosaics. First, try to create simple images of a flower or butterfly with your child, then you can move on to more complex paintings, where you need to post several images. As a result, you should get whole pictures.


In math classes, it is very good to use buttons as counting material or visual aid, for example, to get acquainted with sets. When working with the latter, we do not list objects, but form an image. A dog has four paws, a hand has five fingers, and a hare has two ears. These are all different sets.
Crafts
Buttons are an excellent material for various crafts. A few words about what can be built from them. It will take patience and a little imagination and cute bears, frogs or bees will settle in your house or apartment.
little man
To make button figures from wire, you need to prepare the following:
- insulated wire with a diameter of 1 mm;
- wire cutters;
- universal glue;
- buttons of various colors and sizes.
Measure the required length of wire for the future craft and “bite off” it with wire cutters. To secure the strung buttons, one end of the wire must be bent. You can fold the wire in half and thread it through 2 button holes. We do not place the buttons too tightly, since other parts will be attached between them, for example the legs or arms of the figure. Then the parts are connected to each other, wrapped around the body. If you use bright material, the craft will turn out to be fun and playful.

On the eve of the New Year, you can make original Christmas decorations or even Santa Claus himself and his assistants. Ordinary buttons will come to our aid.
Father Frost
To make Santa Claus, we need to take the following materials:
- red cardboard;
- colored paper;
- golden, blue, white and red buttons of small (up to 1 cm) diameter;
- scissors and glue.
The body will be a cone made of red cardboard. Draw a circle on cardboard, cut it in half and roll it into a cone. Lubricate the place where one side overlaps the other with glue and fix it until it dries. Then we cut out the face and mittens from colored paper. We glue blue and red buttons on the face - eyes, nose and mouth. From small white ones we make a beard. Glue the face and mittens to the body. The fur coat and hat can be decorated around the perimeter with golden buttons. For the pompom, glue two white buttons together and secure them with a clothespin. Santa Claus is ready to go deliver New Year's gifts.

Advent wreath
And of course, what New Year's holiday without a Christmas wreath.
You will need:
- cardboard,
- scissors,
- glue,
- pieces of fabric or ribbon,
- multi-colored buttons.
It is necessary to cut a ring from cardboard of a suitable size. Cover it with colored paper. This will be the basis of our future wreath.

Then we start creating the pattern. We lay out the buttons on our base and make a pattern out of them. After that, glue them to the ring, starting with the largest ones.

Gradually fill the voids with smaller buttons.

Who knows how many interesting things you can make from ordinary buttons with your own hands? This is not as difficult as it seems at first glance, it will take a little time and money. The work you have completed can be an excellent gift for friends and family, because it is a kind of hand-made product, and handicrafts are a very valuable gift.
What to make from buttons
What crafts can be made from buttons depends on your skill, desire and amount of free time. The options can be very simple or very complex, requiring persistence and patience.

Buttons can be used both for independent crafts and for decorating products: hats, scarves, belts, bags. They make wonderful jewelry, paintings, cards and boxes.

Many photos of crafts made from buttons are presented in our gallery.


The simplest but most beautiful products
There are a couple of options that are suitable for handicraft mothers; they can be used as button crafts for an exhibition in kindergarten or school.

Products of this kind do not take much time after a hard day at work; they can be made together with your child.

To implement these crafts you will need:
- colored or white cardboard (depending on what craft you decide to make)
- buttons of different colors and sizes
- ribbons and beads
- colored markers or watercolors
- scissors

Button painting
- Cut out a sheet of cardboard of the desired shape; if it is a postcard, you can fold it in half;
- We draw a stencil with a felt-tip pen or paints (if there are flowers, we draw a stem, for a tree, a trunk and branches)
- You can draw a penguin, elephants, camels: whatever your imagination allows;
- Glue buttons (like petals or flowers, like the crown of a tree, or fill in the stencil of a drawn butterfly or bird)
- We add decorations in the form of ribbons, beads, rhinestones and other things (they will be needed to fill the free space between the buttons)
- We complete the picture or greeting card inscriptions, if desired.


These are the most simple creations that do not require much time to complete.

Volumetric products and materials for them
For those who want to surprise their friends or have skillful hands and want to adapt them, there are options for more painstaking work.

If you decide to make a kind of panel or picture from fabric, or embroider a pillow, you will need:
- threads of different colors
- material (preferably thick fabric)
- the buttons themselves
- beads or beads

Initially, you need to draw with a pencil what you are going to embroider or embroider. Then take the buttons required by color or size and sew them on, not forgetting to fill the empty spaces with beads, rhinestones or ribbons.

New Year decorations
Materials for New Year's decorations:
- base: ball or cone made of foam plastic or foam rubber
- buttons are multi-colored and different in size (can be plain)
- pins
- beads
- tapes

Collecting decorations:
- We put one or more beads on a pin;
- We insert a pin into one of the holes of the button;
- We attach everything to the base;
- If there is a lot of free space between the buttons, fill it with beads or large beads;
- This is how the entire ball or tree is filled;
- Decorate the Christmas tree with ribbons, attach or glue the ribbon to the ball to hang the toy.

You can use your own painted stencils as a template for DIY button crafts.

A sketch is made on the material, then buttons are glued or sewn onto it and a composition is obtained. You can choose any animals or plants, caterpillars or butterflies and make them from buttons.

If you can’t draw or come up with something, you can choose a craft on the Internet, and a drawing from a handicraft book.
Pay attention! 

Stand for glasses or hot drinks
Required materials:
- large and small buttons
- thick thread, needle
- cardboard or wooden board
- PVA glue

For the first option, we sew buttons together with thick threads, you can take different colors, you can use plain ones. We go through each hole of the button with a needle at least 3 times, for greater strength.

You can also glue buttons onto a thick base. You can use cardboard or a wooden board as a base. You can paint cardboard or take colored cardboard and select buttons by color, so the gaps between them will not be clearly visible.

At the same time, you can decorate the glasses themselves using the same glue.

Embroidering an inscription from buttons on a pillow
- We take measurements of the pillow;
- Choosing the material for the pillowcase;
- We cut out the workpiece;
- On paper or on the pillowcase itself, draw the necessary design;
- We arrange the buttons on it, determine how and where each of them will be located;
- Sew on the buttons.

Pay attention! 
For a note
The composition will look more original if you sew buttons through the holes not in the usual way, but, for example, with a cross, zigzag, or triangle.

Photos of crafts made from buttons


Pay attention! 


DIY button crafts are a great opportunity for children to train their fingers and hands, learn to carefully handle small objects and create new images from familiar things. For example, you can invite the children to create an original tree from buttons and suggest different ways to make it:
String buttons of green and brown on a strong fishing line or wire. If you attach a star-shaped button on top, you will get an interesting Christmas tree that can be used as New Year's gift or design element.
Crafts from buttons on wire
You can make the body of a tree from wire, and string buttons on its branches - like leaves. The base for a small tree can be a spool of thread, and for a large one – a flower pot or glass.
 Tree of buttons on wire
 A very beautiful and delicate heart can be made using wire as a basis.

Volumetric crafts from buttons
You can make various funny figures from buttons. For example, you can make a “caterpillar” figurine from buttons and glue.
 Button figurine “caterpillar”
 You can assemble an original bird pendant from wire, buttons and beads.

For the New Year, you can also make pendants - by connecting two buttons of different sizes, we get the body and head of a snowman. We decorate it with a felt or cardboard hat, a scarf, glue a loop - you're done!
 Snowman made of buttons
 By stringing buttons on a string you can create something wonderful. Christmas tree decoration- Christmas tree.
 Christmas tree made of buttons
 A string of beads can be tied together and decorated with a ribbon. We will get a lovely decoration for the Christmas tree.

A very bright and unusual keychain can be made from multi-colored buttons.

You can use buttons to decorate a bookmark.

An ordinary frame becomes a real work of art with the help of buttons and beads.

Look at the video on how to make a very bright children's pencil holder:
Applications for children made from buttons
Buttons make bright, cheerful fish seabed.
 Applique made of buttons and paper “sea bottom”
 And if you glue a piece to the main background corrugated paper and place a pile of bright buttons in it, you will get a delicious cake. This craft can be used to decorate the dining area.

The cardboard one looks interesting, with black buttons glued on instead of dots on the wings.
 Ladybug - button applique
 You can make a beautiful New Year's tree from green buttons of different shades.
 Herringbone button applique
 A very beautiful and delicate “spring meadow” applique can be made from buttons of different colors and shapes.
 Button applique “Spring meadow”
 Look at the video - how to make an applique from “tree” buttons:
An interesting technique is a combination of drawing and appliqué. You can draw a stem and leaves on thick cardboard or a piece of plastic, and use buttons as a head for each flower.
 Drawing and applique “flowers”
 Christmas balls made from buttons look beautiful. We simply draw threads for these balls on a landscape sheet, and glue one bright round button for each of them. This craft is especially relevant before the New Year.
 Drawing and applique “balls”
 You can use buttons to make a beautiful summer butterfly applique.
 Butterfly button applique
 You can make a very interesting and bright “watermelon” applique from buttons.
 Watermelon applique
 DIY button trees
Using the technique of combining drawing and appliqué, you can make a very cute “spring” craft.
 Drawing and applique “spring”
 Using the same technique you can make a gorgeous colored tree.
 Tree applique made from buttons
 Look at what a beautiful mosaic picture “Tree in a Clearing” can be created using paints and buttons. Such a masterpiece will decorate your home and make a wonderful handmade gift.
Button paintings
You can make a real picture out of buttons. You can use thick cardboard or canvas as a base. You can use buttons to make a chic bouquet of flowers in a vase.

You can make a gorgeous rose out of buttons, beads and beads.
 Rosette made of buttons, beads and beads
 Red and black buttons can be used to make a perky bullfinch. In a black frame, such a bullfinch will become a very expressive interior decoration.
 Picture of bullfinch buttons
 Colored buttons make an adorable little owl.

Pictures made from buttons placed in a frame look very impressive. Elephant made from buttons Giraffe made from buttons Starfish made from buttons
You can take the idea for any craft made from buttons to kindergarten, where during creative activities the children will be able to turn it into reality.
Button jewelry
Using buttons and wire you can create an amazingly beautiful necklace. The basis of the decoration will be a colored chain with wide links.

Bright colored buttons can be used to make a children's necklace.

Check out a few more interesting ideas for crafts.
, both simple ones that can be done with children, and complex ones that require a lot of patience and several tools.To make interesting crafts from buttons, you don’t need to have special skills, you just need to stock up on certain tools and learn some tricks.
Here is just a small part of some of the most interesting (simple and not so simple) button crafts that you can make with your own hands.
Button Crafts: Adjustable Button Necklace
You will need:
Buttons
Thread, cord, line, or string (strong and thin enough to fit through the holes in the button)
Scissors
Measuring tape

1. Measure approximately 150 cm of thread and cut a piece. Thread the needle and begin to pull on the buttons one by one.
Start with reverse side buttons, into a hole, to the right and into another hole.
The first button should be approximately 40 cm from the end of the thread.

Insert the second button in reverse, i.e. so that it attaches to the first face to face.
Repeat alternately as much as you want. In this example, the length of the button necklace is 50 cm.


2. Making an adjustable clasp:
Prepare a button with two large holes - you will have to thread it 2 times
Insert this button about 10 cm from the end of the thread

Thread the other end of the thread through the needle and pull the end through the same button (this time it will be on the reverse side).
3. Tie a knot at each end of the thread.
* By pulling the ends of the thread, you can adjust the length of the necklace.

Button bracelet (photo)

Button tree

You will need:
Panel (you can use chipboard, canvas or a wall from a photo frame)
Lots of buttons
Paper for scrapbooking
Simple pencil
Tree and bird patterns (optional).

1. Making the base. If you have canvas, you can paint it; if the wall is from a photo frame, cover it with fabric or you can also paint it; if chipboard, sand the edges and apply varnish.
2. Prepare a tree template. You can print it out and then transfer it to a wooden base.

3. Prepare a bird template and transfer it to scrap paper or thick paper, then paint it.

4. Apply glue to the buttons and glue them according to the tree template. The crown of the tree can be made from green buttons of different shades, and the trunk from brown ones.

5. Glue the birds to the tree.
The painting is ready and can be used to decorate the interior.

Tree made of buttons (photo)


Button tutorial: bowl

You will need:
Buttons different forms and sizes (small buttons stick better)
PVA glue (you can dilute it with a little water)
Brush
Scissors
Jar (on which you will place the ball)
1. Inflate the balloon to the desired size.
2. Place the ball on the jar with the tail down.
3. Cover half of the ball with glue using a brush or just your finger.


* While applying the glue, you can hold the ball by the tail and wiggle it so that the glue spreads evenly. After this, you can place the ball on the jar.
4. Let this layer of glue harden. This will serve as a layer of protection between the ball and the buttons.
5. Apply a second layer of glue and start gluing the buttons - they should fit snugly against each other. Cover the floor of the ball with buttons.
* To prevent the buttons from “sliding” down, after gluing them, turn the ball with its tail up and place it on the jar.
6. Leave the workpiece to dry. This may take several hours.


7. When everything is dry, cover the glued buttons with another layer of glue.
* If necessary, to strengthen the structure, you can apply a fourth layer of glue (after the third layer has dried).

8. Carefully cut off the tail of the ball so that the air slowly comes out of it.
* If necessary, remove excess dried glue using scissors.

Crafts from buttons for children: cars

You will need:
clothespin
Buttons
tube
Thin wire
Adhesive tape (electrical tape)
Regular glue (if necessary)

1. Cut two pieces 2.5 cm long from the tube.

2. Pull pieces of wire through the cut tubes and attach to the ends of the button.

3. Make another such blank and insert both into the clothespin - one secured in front, and one in the back, where you need to secure it with electrical tape.
* You can make several of these cars, and make a slide out of cardboard to let the cars go.


Button applique: flowers

You will need:
Buttons
Wire
Felt, drape (or other dense material)
Pliers

1. Prepare one wire and start stringing buttons on it (through one hole).
2. To secure the buttons, the wire must be bent (see image) and passed in the opposite direction through the other hole of each button.


3. Twist the wire after it has gone through all the buttons.


Master class on drawing and applique of buttons for children 5-7 years old “Trees” step by step with photos
Sredina Olga Stanislavovna, teacher, head of the art studio of the MDOU TsRR d.s. No. 1 “Bear Cub”, Yuryuzan, Chelyabinsk Region
Purpose:
Creating a gift or competition entry
Materials:
Flat buttons, beads, PVA glue, tweezers, wooden skewers, ready-made frames with A4 glass, felt-tip pens, black ink or gouache, soft brushes No. 2 or 3, caps from felt-tip pens - blowers or cocktail tubes.


Goals:
Creating a work for a competition (gift)
Tasks:
Learning to draw fairy trees in different ways, as well as working with glue, tweezers, small buttons.
Getting to know the basics of composition
Cultivating accuracy and consistency
Developing curiosity
Preliminary work:
Introduction to similar works (presentation)

Buttons, in addition to being used for their intended purpose, gradually became decorative element clothes. They emphasized the status of the owner; they could be used to pay and reward. IN modern clothes couture buttons also play an important role.

Then the buttons left the clothes and moved onto paintings, photo frames, and began to live a special life...

Buttons are found in embroidery; they are used to cover boxes and vases. If they are used to create texture, then the surface is subsequently painted in one color.


Buttons have been used as leaves for a long time. Let's look at options from the Internet


Bloating
For this method you need to practice a little on a rough draft. On a brush (squirrel, kolinsky, pony), mascara or black gouache, diluted to the state of mascara, is applied. A line is drawn. Until it dries, you need to quickly, sharply, and strongly blow on it away from you. You can blow through devices or without them. If you blow quietly and slowly, nothing will work.
To draw the tree, we will only need to inflate the lines. In general, you can inflate circles. To do this, you need to blow into the center of the circle.
Drawing fairy trees with a felt-tip pen requires other skills. Thin branches, when blown, turn out spontaneously, like splashes, but they come out straight. With a felt-tip pen we can depict thin branches and twigs, curved and twisted in different ways.
Sequence of work:


We take the glass out of the frame, cut out a sheet of whatman paper to the size of the cardboard (this is done by an adult)

Draw the horizon line with one or several lines, inflate the line away from you (up or down). You will get either snowdrifts (stones) or grass.

Draw a thickened line of the trunk. We don't inflate it. We are waiting for the trunk to dry out slightly.

We begin to draw and inflate the main branches one by one. We blow at will only from ourselves (all branches and twigs will look up). You can blow down (turning the leaf over) - then it will most likely be a tree weighed down with fruits. Or you can blow, arbitrarily turning the work in different directions.

Add twigs. And leave it to dry. The work takes thirty minutes to an hour to dry. This process can be accelerated by placing it in the sun, on a radiator or heater.

Choosing buttons for work. One tree will be rainbow (all colors of the rainbow), another will be fabulous (red-orange), the third will be golden.
We insert the dried drawing into the frame under the glass. We lay out the preliminary composition of the crown. Looking for best option. Let's remember it. We remove the buttons to the side.
When looking for a composition, we adhere to some rules. We do not place all the buttons on one half of the crown, but arrange them evenly. We try to plant a little more buttons - leaves on the tips of the branches. At the same time, we create some chaos. Buttons are not soldiers in the ranks.
Here silhouettes of trees of different species can be useful as a hint.

Using PVA glue, attach the selected buttons to the glass (clean, well wiped). We try not to place identical buttons next to each other. We alternate large ones with small ones, shiny ones with matte ones, round ones with oval ones. Help yourself when laying out with wooden skewers. The sharp end can be placed in the hole and the button can be moved to the desired location. We form a crown and leave to dry.


You can glue buttons with other types of glue (for example, using a gun). This may be a stronger connection, but it is safer for children to work with PVA glue. After drying, it is almost invisible on the glass. And PVA holds up well. The work completed three years ago by Sredinny Yegor lost only a few beads.
The next day we drip PVA glue onto the holes in the buttons. This will help the buttons stick more firmly to the surface of the glass. And you can place small beads on the same glue using tweezers. It will also cover the holes and give an additional decorative effect.

This work is made in a small format and decorated with beads on top of metal buttons.
Options:
Work by Angelina Litvintseva (6 years)


Work by Egor Sredin (6 years)

Literary application:
N. Bragina
Yura sewed on the buttons.
He spent a lot of effort.
Buttons
from mom's box.
There is an even row on the shirt.
-Mom, take part in the parade!
-Well done, my boy!
But he shakes his head:
-One of them has the wrong uniform...
-Mom, this is the commander!
I. Alexandrova
I'm sad. From my shirt
Buttons rush in fear.
As soon as I sew it on, they will come back again
They will break away and run.
Without asking permission,
They go on a break.
I don’t understand what fear
Did the shirt catch them?
V. Yurkov
A button lay in the dust, glittering dullly.
Four round holes. Sad gray color.
And the disheveled sparrow jumped around in circles.
There is no one willing to take the lost button.
Or maybe this button lived on a rag doll;
The rag doll's cheerful gray eye sparkled.
They broke up due to a mysterious story.
And now, poor things, we are separated from each other!
It was a wonderful sunny day and the spring streams rang.
They trampled their feet in search of girlfriends and relatives.
And here the button was blinking with its upper holes
and the lower two sniffed pitifully in time.
Don't leave the orphan on the sidewalk slabs!
Here you go, grandfather with a string bag in his hand!
The button will cover its eyes with eyelashes made from a string
and will sleep and snore on your jacket.