Below we will present several options on how to quickly and easily make scary decorations for the wonderful holiday of Halloween, also with your own hands, from the most ordinary paper and other improvised materials that are likely to be found in every home.
How to make DIY Halloween decorations from paper
Halloween (or All Hallows' Eve)- an ancient holiday that has survived to this day from the pre-Christian era. Traditionally celebrated on the night from October 31 to November 1 in English-speaking countries. The history of the holiday is as follows: among the ancient Celts, October 31 was considered the last day of summer, marking the end of the harvest work and the transition to winter, which began on November 1. The celebration of this transition took place at night, when, according to legend, the door of the world of the dead opened and spirits entered the world of people. To protect themselves from dark forces, the Celts dressed in animal skins, left treats for spirits at the doors of their houses, and gathered around the fires where the Druids performed rituals. These traditions have survived to this day, somewhat modified.
Now Halloween night is one of the most popular holidays among children and youth, a time for fun dress-up parties, when you can try on a carnival costume and have a lot of fun and fool around with friends.
Halloween symbols.The well-known symbols of the Halloween holiday are black cats, bats, spiders and everything that is in one way or another connected with the night, black magic and evil spirits, and the scarier the better! After all, all these creepy attributes are made in order to deceive the dark forces. The most popular symbol is, of course, a jack-o'-lantern called Jack's Head. The lamp was named after the cunning Irishman, who during his lifetime managed to deceive the devil himself several times, and therefore, when he died, he was not allowed into hell, and because of his numerous sins, he was not taken to heaven either. Jack had to wander in the darkness between worlds, lighting his way with a light placed in a hollowed-out turnip. And such lamps began to be carved from pumpkins in the United States of America, where the harvest of this vegetable is harvested at the end of October.
If you decide to throw a party for Halloween, then you are probably thinking about how to decorate the room in accordance with the traditions of the holiday.
We make our own lamps from glass jars

To make such lamps, glass jars of any shape and size, acrylic paints or special paints for painting on glass, PVA glue, brushes and black colored paper are suitable.
A well-cleaned jar should be coated with paint and an applique of pictures cut out from paper templates should be glued on top.
You can cut out figures from plain paper, and then tint them with black paint.
Such lamps with a tea candle placed inside will create an atmosphere of mystery that matches the spirit of the holiday.
And here is another version of the lamp, reminiscent of a mummy's head, for the manufacture of which you will need an empty glass jar and a roll of toilet paper:

Everything here is very simple - you need to wrap the jar in several layers of paper, secure it with glue or tape, and draw eyes with a felt-tip pen. You can insert a tea light into the jar, but it is better to use special small diode lamps for safety reasons.
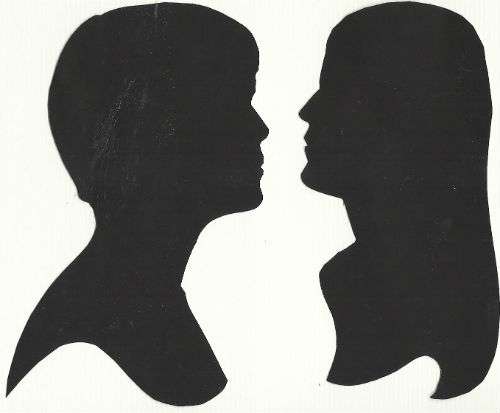
Trying to attach terrifying silhouettes to windows
Another very simple, budget-friendly and effective way to decorate for Halloween is silhouettes on the windows. Here you can use your imagination, cut out any creepy picture you like from paper and stick it on the window glass. When it gets dark and the lights turn on in the room, eerie shadows will appear on the windows:

We make bright paper pumpkins for the windowsill
These bright and original pumpkins can be made from orange paper!
From 4 sheets of A4 folded like an accordion you get one pumpkin:

All that remains is to glue on Jack’s creepy smile and eyes, a green stalk, and the elegant decoration is ready.
We release a large flock of paper bats
This is simply wonderful in its simplicity and original decoration of the hall for a Halloween party. Simply cut out silhouettes of bats of different sizes from black paper, bend them in half and attach them to the walls, ceiling and windows using double-sided tape or stationery gum. Below are stencils that you can use.

You can make such a garland from baking paper - it is thin and easy to cut. You need to cut a strip of paper of the required size from the roll, fold it like an accordion so that the silhouette of a little ghost fits on each part. Then transfer the silhouette onto paper and cut along the contour. The garland is ready! You can draw the silhouette of a ghost using this template.
Here are a few more options for garlands for decorating rooms, which can be easily made from paper:

Simply cut out the figures you like from paper in traditional Halloween colors, thread a thread through them and hang them under the stream and on the windows.
If you have not yet decided on the decor option for your home for a Halloween party, look at the photos for examples of how to decorate a room.

As well as a selection of videos that tell you what other decor options you can use to make the party in your home bright and unforgettable.
A selection of videos on the topic of the article
The famous Halloween holiday is coming to Russia very soon. And this may mean that fans of such holidays should prepare for it. And, of course, it’s worth doing this in advance. Quite often, in this case, Halloween decorations are made with your own hands. It is worth noting that this activity is very exciting. Overall, read this article to get inspired with fresh ideas and make your home or apartment charming.
Of course, in order for the party to be interesting it is necessary: to prepare a menu for the holiday, to wear a beautiful suit. It is also worth thinking about the decor of your room where the celebration will take place.
Making your own Halloween decorations
The bats.
Traditional symbols of Halloween are many objects, one of which is bats. You can make such mice yourself. For this case take:
- Double-sided tape and scissors,
- Black paper, pencil or printer.


Progress:
- The mouse template can be printed from a computer, or you can also draw it by hand. Then this template is applied to black paper and traced again with a pencil.
- Next, the mice are cut out with scissors.
- Now a thread is attached to the mouse figures. In this case, the mice can be hung from a chandelier or from the ceiling. They can also be attached to the walls with tape.
- As you can see, you can decorate your home with such figures not only inside, but also outside.


A dark silhouette or a dark ghost.
How to make Halloween decorations from paper? And it is worth saying that this issue is not particularly difficult if you have any knowledge in this area. If your house has steps, then you can create a ghost effect on them that will be frozen. It doesn't look really cool. To make this element you should use:
- Double-sided tape and scissors,
- A simple pencil and black paper.
Progress:
- First, you should take sheets of black paper. And on each such sheet it is worth drawing the individual elements of this ominous figure.
- Now the elements are cut out using scissors and glued to the end parts of the steps.

On a note! Use templates when drawing the ghost's head. In this case, it will turn out smooth for you.
Mummies from the crypt.
Above, some very interesting crafts were presented for readers of the site, but they are not complicated. Now let's move on to describing more complex elements that will allow you to create an interesting, terrifying atmosphere in your home. For crafts you should use:
- Strong tea and bandages,
- Mannequins that are human-sized.
Progress:
- So, first of all, prepare strong tea. Then soak all the bandages in this tea.
- The bandages should now dry. After which you can begin wrapping the mannequins with these bandages. You can leave the ends of the bandages hanging down.
- Ready-made mannequins can be installed near a wall or placed near it.

Garden wheelbarrow and bones.
If you have planned an outdoor Halloween celebration in the courtyard of a country house, then in addition to the home itself, it is recommended to decorate the courtyard as well. To make the following accessory you will need:
- Plastic bones and a garden wheelbarrow.
- Sand or earth to fill it.
Progress:
- It’s worth buying plastic dice in advance; you can do this at a prank store.
- The garden wheelbarrow is filled to the top with sand or earth.
- After which the bones are scattered into the sand or ground in a chaotic manner.

Zombies in the ground.
In this article we are talking about how to make Halloween decorations. But in addition to home decoration, here you will find items that will be used as yard decoration. For the next decoration element you should use:
- Sand and threads
- Any old pants.
Progress:
- So, first of all, each trouser leg is sewn up using threads. This is done at the bottom.
- The trousers are then filled with sand. The trousers are also sewn up at the top.
- Socks are put on the resulting legs.
- Then the finished craft can be placed upside down on the lawn.

Zombie pumpkins for the garden.
Decorating a house or garden with pumpkins is a traditional activity. And if you don’t know how to make crafts from this popular vegetable, then this publication will teach you how to do this. So, first of all, prepare:
- Street candles and pumpkin.
- Knife and spoon.
Progress:
- The top of the pumpkin is cut off. Then use a spoon to remove all the pulp from it.
- Using a knife, carve faces on the pumpkin. At the same time, they must be intimidating.
- Now all that remains is to install candles inside the pumpkins and find a suitable place for them in the garden.

Pumpkins for the home.
Pumpkins make a great decoration item. And you can safely use them to decorate your home. You should use:
- Paint black and pumpkin.
- Scotch tape and face templates.
Progress:
- Take the face template and use tape to secure it to the pumpkin.
- Next, the template part is painted with spray paint.
- Now the paint should dry, and the pumpkin should take its rightful place in your home.

Beautiful pumpkins.
If you don't tinker a lot with making crafts, your guests invited to the Halloween masquerade ball will be delighted with the decoration of your home. To make a craft use:
- Cool gun, or glue moment.
- Beautiful rhinestones that will have different sizes.
- Small plastic spider.
Progress:
- The rhinestones are attached to the pumpkin using glue. It is worth fixing the rhinestones in the form of a web.
- Then a plastic spider is fixed on top of the web.

Mummy pumpkin.
Different decorative elements can decorate your home on Halloween night. To create this element use:
- Bandages and glue moment,
- Toy eyes, pumpkin and bandages.
Progress:
- First, the pumpkin is wrapped in bandages.
- And on the penultimate layer the eyes are fixed. This is done using glue.
- The bandages themselves are coated with red gouache if desired. As a result, the pumpkin will turn out to be more intimidating.

Faces made from toilet paper.
Want to know how to make your own Halloween decorations? Then find the answer to this question in this publication. It is worth noting that our article presents those crafts that are very easy to do. For example, to get the following product, prepare:
- Scissors and glue.
- Unnecessary toilet paper rolls and black sheets of paper.
Progress:
- First, interesting faces are cut out of black paper.
- These elements are attached to toilet paper rolls using glue.


Skull mask.
As you can see, many ideas were created just for those people who decided to decorate their home with something interesting for Halloween night. For example, for the following craft it is used:
- White paper and tape
- Pencil and long wooden skewer.
Progress:
- Using a simple pencil, draw the outline of the skull on white paper.
- Cut it out with scissors and then use tape to glue it to the skewer
- You can also decorate such masks to your own taste with bright colored markers.

Decorations for the festive table.
The decoration of the festive table also deserves due attention. Therefore, some elements will be an excellent decoration. To make just such an element, use:
- Rough rope
- A thin branch
- Scissors.
Progress:
- Fold the rough rope in half and cut it with scissors.
- Attach the resulting bristles to a thin stick.
- Place decorations around the house or near decorative plates for a holiday dinner.

Traces in the house.
It’s easy to make the interior of your home unrecognizable. All you have to do is make special traces and stick them up. Here in making crafts you should use:
Double-sided tape and black paper.
Progress:
- It is worth printing the prints on the printer.
- The marks are then cut out and posted throughout the house and even on furniture.


Table decoration.
Everything should look interesting on Halloween. Therefore, even the legs of the table may be decorated in this case. You should find:
Shoes that have pointed toes and knee socks with stripes.
Progress:
- First, knee socks with stripes are pulled onto the table legs.
- Then old shoes with toes are put on the legs of the table.

Home decor. Ideas and templates
If you want to celebrate Halloween brightly, then ideas for decorating your home and garden will be useful for you. Of course, the easiest way is to decorate the house with some figures. But making such figures by hand will be a problematic task. But if you download and print or redraw the following templates, then everything should work out for you.
Finished figures can be glued anywhere. This can be not only walls, but also furniture and even a refrigerator.


ъ  ъ
ъ 
Ghosts.
With our tips, you can make traditional Halloween decorations. But how can you imagine such a holiday without ghosts? Know that they can add some color to the room that will be special.
A ghost from a napkin. To begin with, you should take a napkin and place a round object inside. This could be: a small bead or nut. Such a head should be wrapped in thread. Now you need to draw the eyes and mouth of your ghost with a marker. Hang the finished ghost from the chandelier. Use the thread of the size you need.

Bringing from whatman paper. In this case, take whatman paper. Draw the ghost's features on it and cut it out with scissors. Now take a marker and draw the facial features. The finished product is attached to the wall using tape.

Instead of a conclusion
As you can see, DIY Halloween decor and room decoration in a mesmerizing style can be varied. And here you can use the idea that you like best. In general, choose whatever suits you and receive continuous compliments and admiring glances from your guests.
Useful tips
Halloween is a holiday that dates back to the ancient Celts. Ireland and Scotland.
It is noted October 31, on the eve of All Hallows' Day and is generally celebrated in English-speaking countries, as well as in Japan, South Korea, Singapore, Australia and New Zealand.
But since the end of the 20th century, this day began to be celebrated in many non-English speaking countries of Europe and in the former Soviet republics.
On this day, many people dress up in scary costumes and decorate their houses and offices with various crafts.
On our website you will also find:
Here are some interesting ideas on what crafts can be made for home, garden, office or even as a gift:
Halloween Decorations: Tin Can Lights

You will need:
Empty tin cans
Hammer and thick nail
Brush and paint (acrylic or spray)

1. Fill a tin with water and place in the refrigerator. When the water freezes, remove the jar from the freezer.
* You need to freeze the water in the jar so that the jar does not get wrinkled when you make patterns with a hammer and nail.

2. Using a marker, draw any image or face on the jar. It is advisable that the design be simple - the silhouette of a cat, a witch's hat or a flying mouse.


3. Place the jar on a towel to cushion the hammer blows.
4. Using a hammer and nail, make holes that will outline your design on the can.


5. Once you've finished making the holes, place the jar in the sink and turn on the hot water to melt the ice.

6. Paint the jar. The paint may cover some of the holes, in which case you will need a toothpick to remove the paint from the holes.

7. Place the candle inside the jar.
* If desired, you can make two holes in the top of the jar (on opposite sides) and attach a wire so that the jar with the candle can be hung.
DIY Halloween Decorations: Flying and Burning Witch Hats

You will need:
Simple witch hats (found at the supermarket)
Glow sticks (LED)
Pins
Safety pin (safety pin)
Adhesive hooks or suction cup to which you can attach fishing line.
1. Attach adhesive hooks in the places where you want the witches hats to hang.
* You can skip this point if you are tying the fishing line to a chandelier or other objects.

2. Using a needle, thread 80-90 cm of fishing line through the tip of the hat, but do not stick the fishing line back out.

3. Tie one end of the fishing line to a hook (you can make a loop in advance and hang it on the hook), and tie a pin to the other end and attach a glow stick to it.


DIY Halloween pumpkin: lamps in the shape of black cats

You will need:
Pumpkins of suitable shapes (one oblong for the body and one small round for the head)
Knife, spoon and/or other items to help clean out the inside of pumpkins
Felt or colored cardboard
Scissors
Skewers (if necessary)
Sweets (optional).
1. Cut off the bottom of the oblong and round pumpkins and clean out their contents.
2. Using a knife, cut out cat eyes into the round pumpkin. You can draw them first and then cut them out.
3. Cut out your cat's ears from felt or colored cardboard. To keep them on the round pumpkin, make small cuts in the pumpkin and insert the ears into them.

4. Paint the pumpkins black after inserting newspaper into them. If you use spray paint, you should paint outside or in a very well-ventilated area and wear a mask.
5. When the paint is dry, remove the newspapers from the pumpkins.
6. Prepare a candle; it can be placed on a saucer or plate made of clay.
7. Place the round pumpkin on the oblong one and make sure it holds well. If necessary, you can use skewers to thread the pumpkins onto them. You can also paint the skewers black.


*If desired, you can use small pumpkins for the cat's paws and tail.
DIY Halloween at home: a ghost floating in the air

You will need:
Plastic bottle (in this example 1l)
Liquid starch
Old towel
Gauze (sieve fabric)
A piece of felt
Styrofoam ball
Scissors
Wire
Hairdryer (optional)

1. Place a towel on your work surface.
2. Place a foam ball on a plastic bottle and screw it a little into the neck of the bottle.
3. Use wire to make arms.

4. Place gauze over the resulting form. Spray your ghost with starch - the more starch, the stronger the ghost will be.

You can use a hair dryer to help the liquid starch dry faster.

5. Once everything is dry, remove your shape from the bottle, ball and wire and cut out the felt and glue the eyes to the ghost.
DIY Halloween Crafts: Bat Chandelier

You will need:
Black construction paper or felt
Black acrylic or spray paint
White pencil (if using felt, then a white fabric marker)
Brush
Scissors
Hoops (3 different sizes)
Duct tape or washi tape
Thick thread (preferably black) or fishing line.

1. Take the hoop apart and paint it black.
2. While the paint is drying, make some flying mice. Draw and cut out the silhouette of a bat on paper - this will be your template. Trace the template onto black paper using a white pencil or marker. Cut out all the figures.

3. Tie 3 threads to a large hoop (see image). Next, tie the medium and small hoops at the same distance from each other - you will get a chandelier.


4. Use black electrical tape y to attach your paper bats to the chandelier.
5. Now you can attach the craft anywhere.
Halloween Ideas: Hanging Ghosts

You will need:
Styrofoam balls (preferably different sizes)
Black paint (acrylic)
Brush
Gauze (sieve fabric)
Loop screw
Super glue
Scissors.
1. Insert the loop screw into the foam ball. You can add glue to help the screw hold better. Let the glue dry.
*If desired, you can paint the screws white.
2. Using black paint, paint the ghost's eyes on the foam ball. Let the paint dry.

3. Cut a square piece of cheesecloth or sieve cloth and place it on the ball.

4. Using scissors, make several cuts at the ends of the gauze. Pull the slightly cut gauze to create a slightly messy ghost outfit.


DIY Halloween for kids: glowing eyes

You will need:
Cardboard cylinders for toilet paper or paper towels
Glowing sticks
Duct tape (wide opaque tape, masking tape, or wide electrical tape)
Scissors or utility knife
Pencil.
1. Draw different shaped eyes on the cardboard cylinders (see image).
2. Using scissors or a utility knife, cut out the places where you drew the eyes.

3. Use glow sticks to “light up” your eyes by inserting the sticks inside the cylinders.
4. Cover the sides of the cylinder holes with adhesive tape.

5. It remains to hang or simply put the glowing eyes in dark places in the house or garden.
How to decorate your house for Halloween with your own hands: a huge cobweb on the wall

You will need:
Double-sided tape
Gray or black thread
Toy spider (optional).


1. Think about what your web will look like - what size it will be, and how your threads will go. Based on this, stick small pieces of double-sided tape to the wall - you will need a lot of pieces.
2. First glue the pieces of thread that go from the center (straight lines), and then start gluing the threads that go in a circle.

*If you wish, you can attach a toy spider with tape.
Halloween Ideas: Glowing Ghost Garland

You will need:
Garland (preferably made from round light lanterns)
Cotton fabric
White thread
Scissors
Black marker.

1. Cut the fabric into square pieces. In this example, the side of the square is 35 cm.

2. Fold each square into a triangle and cut off the tip. When you straighten out a square piece of fabric, there will be a hole in the middle.

3. Carefully remove the lanterns from the garland, put fabric on them so that the hole is on top, and insert them back.
4. Tie a thread at the bottom.
5. Use a marker to draw eyes and mouth.

How to Decorate a Room for Halloween: Mummy Candlesticks

You will need:
Glass jars
PVA glue
Brush or sponge brush
Scissors
Toy (plastic) eyes
Battery-powered candles or simple tea lights
Acrylic or watercolor paints.

1. Cut the gauze into several long strips.

2. Apply some PVA glue to the top of the jar.

3. Glue one strip to the can and begin wrapping it around the entire can. Secure the gauze in some places with glue.

4. Continue wrapping the jar and adding glue in places.
Greetings to all those present! Halloween is close, and therefore I announce the topic of today’s article is Halloween decorations.
I like this holiday so much. Not creepy zombie vampire costumes or the like. (although they can be made interesting, believe me, I told you in this article), but the atmosphere itself is something mysterious and mystical.
Just recently I wrote an article about makeup for Halloween. And shared it on one of the social networks. networks And then I realized that the terrible medieval opinions about this holiday are not only alive, but thriving in all their unhealthy splendor.
In short, what I’m saying is that I really hope that you, dear reader, are not one of these obscurantist individuals.
After all, Halloween is just a reason to remember that we are not eternal. And he does not at all call evil spirits into the house, for that matter
DIY Halloween Decorations: 13 Ideas
Mostly the ideas will be for the home, so that you can create the appropriate atmosphere. Many of them are so simple that in a day you may well have a fairly large number of attributes of the theme of this holiday.
Halloween Home Decorations
With the help of various kinds of mercies and horrors we will achieve wonderful effects.
Mouse Pack
The simplest and most affordable way to decorate a room is to cut out unusual compositions.
In order to make it, you will need bat templates. Cut them out of thick paper or felt and attach them to the wall.
You can do it differently: glue the mice to long thick threads. Then it will turn out to be a kind of “rain”.

Web
Again, a fairly simple idea that will allow you to add a fun accessory to your home interior.
For the web, take a few sticks, shiny woolen threads, a needle and a glue gun (you can use regular glue).
Glue the sticks together in the center and wrap it with threads for strength. The final stage is to wrap the resulting frame with thread to create a spider web pattern. Threads can also be fixed with glue.

Ghost
A little ghost will not only be a great decoration for your apartment on Halloween, but will also be a pleasant surprise for kids and adults.
For it, prepare: glasses wipe or paper napkin, lollipop and ribbon. Wrap the lollipop in a napkin and tie the center with a ribbon. Draw a muzzle.
To hang this miracle indoors, simply sew a ribbon loop to the head.

Scary balls
All that is needed for such an accessory are balloons inflated with helium, beautiful ropes for tying them up and scary sticker silhouettes.
You can make such a composition in different ways: either inflate balloons, attach strings and stick stickers, or prepare design templates in advance and apply a pattern using a can of spray paint, applying paper with a pattern to the ball. The first option seems less expensive to me.

Special roses
Roses here are made very simply - a circle is cut out of felt and a spiral is cut out inside. Then the structure is rolled up (at the same time glued) and attached to the desired location.
In this case, this place is a Halloween wreath, rolled up from thin branches.
By the way, you can buy an excellent set of felt Here. More than 40 colors, dense - just what you need.

You can also do something similar for the New Year - that’s great too

Fruit madness
Nobody canceled the decorations on the table either. And I think there’s no need to even tell you how to do this.
Take bananas, peeled tangerines, chocolate and neutral greens with a dense stem (say, lettuce). Stick green twigs into the tangerines.
Peel the bananas and cut into two parts. Melt the chocolate in the microwave and pour over a flat surface (such as a large plate). Wait until it dries. Using a round lid, cut out eyes and a mouth and attach to the banana.
Terribly scary and terribly healthy treats are ready

I hasten to wrap things up, because I told you 13 ideas for decorations for October 31st. Share your impressions and ideas in the comments. See you soon!
P.S. Subscribe and repost.
Sincerely, Anastasia Skoracheva


