When gray cloudy days come, you really want to cheer up, and even with bright colors in jewelry! Bright, yellow as the sun, multi-colored bracelet - it immediately makes you come to life and smile. Moreover, it is not difficult to do it and not for long - you can do it in an evening.
You will need:
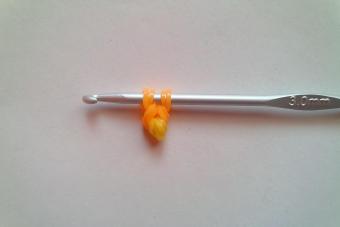
Pins - 35-40 pcs. (these are 4 sets) 3.5 cm long - the smallest;
Elastic thread;
Large beads of 2 colors: yellow opaque and green translucent and beads of medium size orange.
1) We measure the elastic band - its length should be double the girth of the wrist plus 3 cm on each side for ties.

2) We start collecting the bracelet. To do this, we string a pin onto the elastic band, leaving equal ends of the elastic band on both sides.

3) We string beads and beads on pins, alternating colors. Then we crimp the latch of the pin with pliers so that the needle does not pop out while wearing the bracelet.
We string a pin, then we string a bead on each side and again a pin. The bracelet will be more beautiful if you alternate the pin latches on different sides of the bracelet, as you can see in the photo.

4) We complete our bracelet. To do this, we pass the ends of the elastic thread from the last pin through the holes of the first pin and tie them into two knots.

5) We try on the hand and see that the bracelet fits snugly on the hand without gaps and holes, does not spread around the wrist. If there are not enough pins, we untie the bracelet, add pins and finally fix it with 3 knots. Also, for greater reliability of the bracelet, you can thread a wide elastic band 2.5-3 cm between the pins inside the bracelet and sew its ends.
If you have unnecessary pins - about fifteen or twenty .. and a few different-sized beads - then you can make an interesting needle bed.
Let's get the pins ready. It took me 16 pieces. But you can make more. My pins are about 3.5 cm long.
Let's take our stock of beads and find the right ones.
I decided to stop at white ones - 6 mm and 3.5 mm in diameter, and black ones - 5 mm and 4 mm in diameter.
I collect beads on a pin in the following sequence:
Black 4mm+White 6mm+ Black 5mm+White 6mm+Black 4mm
Of course, you can choose a more convenient and pleasant option from your stocks.

String beads on all pins

Cut off a piece of wire with a margin (I cut off about 20 cm)

We squeeze the heads of all the pins with pliers so that they do not inadvertently unbend

We also squeeze the heads from the sides - to remove the gap in the fastener. Otherwise, the wire will slip through it.

Here we get such a flattened pin head on all sides

We string the pins on the wire, alternating with 5mm black beads

On one side, the row should end with a pin, and on the other, with a bead

After we have assembled, we fix the wire. I connect with a crimp. This is such a small cylinder - a wire is inserted inside and clamped

We tighten the wire until it stops - so that the pins do not flounder and clamp the crimp with pliers. If you do not have crimps, you can simply twist the wire.

We fill the ends into several adjacent beads and cut off

We also collect the lower part of the basket on the wire. Here I alternate pins with small white beads.


I also fix it with a cream

Hide the tails in neighboring beads and cut

We make a pen. I have a thin wire - so I make it double.
We cut off a piece of wire twice as long as the future handle and with a margin for fastening. If your wire holds its shape well, then you can make the handle single.
I pass the future pen through the wire of the top row, align the tips and secure with a crimp

I put the ends of the wire together and string the beads

I pass one end of the wire through the top row with pins, connect it to the second tip and fix it with a crimp

I also hide the tips in neighboring beads

Here's the frame


We make the inside of the needle bar. Cut out a circle from the fabric

We collect along the edge with a thread, tighten

Filling with filler

I didn’t like the fabric in the previous version - it was too dense and gave ugly folds. So I took a piece of lace

Sewed it in the form of a bag

Filled with synthetic winterizer and tightened the open edge with a thread

We put the resulting pillow in the basket

It remains to make a bottom. I used a two-ruble coin as a template. Cut a circle out of felt

And glued with Moment-Crystal glue to the bottom of the basket

Now you can stick needles


Not a single woman will remain indifferent passing by a showcase with jewelry. Beautiful and elegant gizmos and attract the eye. A little patience and time is all that is needed to become the owner of an original voluminous necklace or bracelet made of beads and pins. This accessory will look great with almost any outfit. Seeing this idea, I could not restrain my emotions: what a miracle, how elegant these bracelets and necklaces are.
How to make a bracelet out of pins and beads
Decorations made of pins and beads are easy to make, and due to the fact that the rows are quite dense, you can try to depict some interesting pattern, or an original ornament, alternating different colors of beads.
Simple pin and bead bracelet
You will need:
- safety pins (the number depends on the thickness of the wrist)
- beads
- rubber band
Manufacturing:
First, pick up beads that will easily be strung on a pin. After that, you can start putting beads on a pin, you can experiment with different colors.
To get a dense surface of the bracelet, you need about 90 safety pins! The beads should be tightly strung on the needle of each pin.

When all the pins are filled, take an elastic band and tie a knot at the end. We will need two elastic bands of the same length - one for the top of the bracelet, the other for the bottom.

Now you need to string the pins on the elastic in this order (see photo)

We begin to pass the elastic into the eye of the pins, stringing one after the other

When all the pins are in place, try on the bracelet to see if it is tight or, on the contrary, slips off the wrist.

How to make a bracelet out of pins and beads
Tie the elastic bands, cut off the excess ends. The women's bracelet made of pins and beads is ready, it remains only to try it on and enjoy the original craft.

The bracelet should turn out to be elastic - easy to take off and put on.
Experiment with various types beads and beads to achieve an impressive effect ... At first glance, you can’t immediately determine what this bracelet is made of.

Gold pins are just a godsend for creating real masterpieces!

Use various beads, imitation pearls or shells to create a bracelet from pins.

Everyone can make a bracelet made of beads and pins with their own hands! I will show the idea to my seven-year-old niece, maybe she will be interested!

This bracelet will be a great addition to your evening dress!

From small pins and beads you can create a spectacular decoration in ethnic style.

Or such an elegant necklace, for a daytime and business look

Maybe I'll make myself such a necklace ...

Here are some more ideas of bright bracelets made of pins and beads.

Now you know how to make an elegant and original bracelet out of pins and beads, and you can easily create a whole collection of amazing jewelry for every occasion. Share the idea with your friends by showing them this article! Agree, creativity decorates and fills our life ...
Press "Like" and get only the best posts on Facebook ↓
Handmade souvenir doll made of pins and beads. Master class with step by step photos.
Doll-souvenir made of pins and beads. Master Class.
Ruchina Irina Yuryevna, educator BUSOVO "Cherepovets Center for Assistance to Children Left without Parental Care," Our Children "Cherepovets, Vologda Region.Description:
This master class is designed for children aged 10 years and older, teachers of additional education and educators.
Purpose:
A souvenir doll made of pins and beads can be wonderful christmas decoration for the New Year, a memorable surprise for relatives and friends, like a doll amulet. By attaching a small carabiner, you will get a nice pendant or key chain.
Target:
Making a souvenir for the holiday.
Tasks:
1. Teach how to make a souvenir doll from pins, beads and beads;
2. Develop fine motor skills hands;
3. Cultivate accuracy, patience, perseverance.
4. Cultivate the desire to make gifts with your own hands.
The choice of industrial souvenirs is great, traditional magnets, notepads, figurines, mugs, key chains... Their importance can hardly be overestimated. But along with stamped products, handicrafts have always been in great demand. A certain connection with antiquity and traditions can be traced in many products created by hands. They are neither worse nor better, they are different. Each artist, as a rule, works in his favorite technique, manner, perhaps school. And even souvenirs made according to the same pattern are sure to have differences.
Souvenirs and amulets, crafts with symbols, dolls, our ancestors treated with great attention. They believed that in addition to rituals, such souvenirs were the first assistants in the confrontation with black magic, illness, with the evil eye, from the influence of evil people and bad luck. I want to offer to make an original souvenir doll. When making a doll, as an amulet, a souvenir, a toy or a gift, remember that this is a little more than just a doll.
So that goodness reaches into the house.
Let the amulet be in it
To have bread in the house
And it was filled with love.
Required material:
- pins 10 pieces (40 mm);
- wire for beading (copper) No. 03;
- beads 5 mm 25 pcs.;
- beads 4 mm 50 pcs.;
- beads 3 mm 50 pcs.;
- 12 oblong beads;
- bead 6 mm 1 pc.;
- bead 7 mm 1 pc.;
- wire cutters;
- pliers.

Step by step description the process of making a souvenir doll from pins.
We begin work with the manufacture of a souvenir doll skirt. We string 4 beads (3mm), an oblong bead and 1 bead (5mm) on each pin. To prevent the pin from opening during work, we clamp the eye of the pin with pliers.

We make 10 blanks.

We cut off the wire, 10 cm long and collect the blanks by threading the wire through the loops of the pin.

We turn the wire into a circle, twist the edges, cut off the excess ends with wire cutters. We got an elastic band of a skirt.

We make the bottom of the skirt. We take a wire 20 cm long and 10 beads (5 mm). We pass the wire through the eye of the pin, string the bead. We alternate, thus, until all the pins are on the wire. We fix the wire drawn into a circle with a pair of turns, cut off the excess wire with wire cutters and hide the ends.

Got a skirt.

Let's start making the crown. On a wire 35 cm long we string beads in the sequence: 1 bead (4mm), 5 beads (3mm), 1 bead (4mm), 5 beads (3mm).

We take a bead (6mm), which will serve as a head and use the cross-weaving method to thread the wire through the middle and tighten it.

It turned out the first row of the crown.

We carry out the second row of the crown. We string beads on one end of the wire: 3 pcs (3 mm), 1 bead (4 mm), 3 pcs. (3mm). We pass the wire through the middle of the bead (6mm) and tighten the ends.

It turned out the second row of the crown.

For the third row, we take 2 beads (3 mm), 1 bead (5 mm), 3 beads (3 mm), repeat the procedure.
The crown is ready.

We make earrings. We take a wire 30 cm long, string 2 beads (3 mm), pull one end of the wire through 1 bead and pull the bead up.

We stretch both ends of the wire through a large bead. On the second side, repeat the procedure.

We connect the wire together and make 1 turn.

We attach a bead (7 mm) to the head with cross weaving, which will serve as the body.

Let's start making hands. We take a wire 35 cm long, string an oblong bead on it, 3 beads (3 mm). Leave 1 bead (3 mm) on the wire and pull the wire through the rest of the beads.

We tighten the wire.

We stretch both ends of the wire through a large bead 7 (mm). On the second side, repeat the procedure.

Hands are ready.

We twist all the wires together and pass through the center of the upper part of the skirt, tighten. We pull the wire out, make 3-4 turns, cut off the excess wire with wire cutters and hide it inside the skirt.
Our doll is ready. The volumetric figure turns out to be stable, it can be used as an exquisite figurine.

Pins can be of different sizes, the purpose of the souvenir depends on it. A small chrysalis can serve as a keychain.

You can also use beads and beads of different colors and shades, and you will get wonderful New Year's toys.

In this master class, we will show you how to assemble an interesting and non-standard jewelry in the form of a bracelet with your own hands and with the help of beads and pins. Choose the color you want and get to work.
Accessories:
Green colour
Czech seed beads
pins
Rubber
Tools: pliers and scissors
Assembly:
To work, you first need to select and prepare pins. You will have to determine the number of pins by eye, because they come in different sizes and thicknesses. After that, we select the desired color of the beads and check whether the holes of the beads fit the pin needle. In our work, we will use Czech beads so that the pattern of the bracelet is even.
Open the first pin and fill the needle with green beads.

We fasten.


Later, you don’t have to worry that the needle may open, as it is tightly clamped.

We fill in this way all the pins with two colors.

Then lay out the pins in the order as in the photo:

We measure two pieces of gum. If desired, you can use an elastic band in two layers.

And we pass the elastic bands through the extreme holes and loops of the pins.

Tie tight knots.

AND interesting option jewelry made of pins and beads in the form of a bracelet is ready!