Great news for everyone who wants to make exclusive things. Especially for you - crocheted booties for beginners with a step-by-step description.
It’s not difficult to knit such a touching accessory, and thanks to them your baby's feet will be comfortable and warm. It will be best if the mother herself knits this accessory for her baby. Only mother’s hands can knit the softest, most beautiful and tender booties in the world. And what a variety of patterns and video tutorials dedicated to knitting booties exists today! We invite you to plunge into this incredibly beautiful art - and learn with us how to crochet booties for beginners.
We have already told you about it and provided you with various diagrams and patterns. In this section we want to show you a way to knit cute booties that will be understandable even to a beginner. So, we take soft yarn of two colors and a thin hook for work.
1. Knitting the sole, it will be 10 cm in length. To do this, we collect 12 air loops and add 3 lifting air loops. We get 15 ch.
2. Insert the hook into the fourth loop (in the direction from the hook) and knit 3 rows according to the pattern you see in the photo.  3. Now we take threads of a different color and move on to the sides.

4. To knit the fourth row, we knit a single crochet loop into the back wall of each stitch. We tie the bootie with loops in the amount of 56 pieces.

5. We knit the fifth row, just like the fourth. We get 2 white rows.

6. Change the color of the threads to blue and knit cones. We create them according to the following scheme: knit 2 chain stitches, then 2 unfinished stitches and make an air loop.
 7. We should skip one loop and then knit another cone.
 8. Make an air loop.
 9. Continue knitting according to this pattern. In this way we should make rows 6 and 7.

10. At the end of the seventh row we close the knitting and break the thread. Take a white thread and insert the hook strictly in the middle of the side.

11. We begin to knit the toe of our bootie. Insert the hook into the back wall of the loop and knit a white cone using 2 unfinished loops.

12. The next white bumps will consist of three unfinished loops. Total there should be 14 loops, which will become the outline of the toe of the bootie. The last bump will consist of two unfinished loops.

13. Turn the work and continue knitting cones on the next row.

14. Make 7 cones and connect them together.

15. Make 4 more cones.

16. We finish the row.

17. We knit 2 more rows of white cones and change the color of the threads to blue.

18. Let's move on to decorating. To do this, you need to knit 3 air loops for each column.

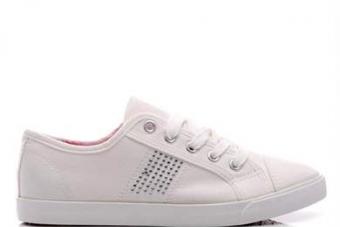
How to knit booties: sneakers for baby
Modern booties are not the usual “grandmother’s” slippers with huge flowers, tassels and bows (although these often look like masterpieces). This is also stylish sneakers for boys, adorable boots or cute ballet shoes for girls, as well as absolutely awesome little animals for everyone, everyone, everyone. And right now we will show you how to crochet booties and sneakers. And not simple ones either, but with the Adidas logo, just like in the best stores. Although you can’t buy such a masterpiece in any store. Prepare some inspiration (maybe in the form of a baby who is currently sleeping), cotton yarn and hook number 2.

1. We knit the sole according to the pattern. Almost all baby booties begin to be knitted from the sole.

2. We make 2 rows up without increasing with single crochets. Please note- decorative embroidery in a contrasting color.

3. So far, here are the simplest crochet booties for beginners. We knit a sock from 30 front stitches. We knit the first row with single crochets, the second - with double crochets (3 loops with one vertex). You should still have 10 stitches left.

4. We fasten these 10 stitches together, pass the thread to the beginning of the row and make 2 rows of single crochet.

5. Double crochet - 7 rows. Leave holes for the lace.

6. We make the “tongue” of our sneaker. We knit the last 3 rows with white threads. We tie the product around the perimeter for beauty.

7. Embroider the Adidas logo, make a lace and pull it through the holes.
Here we have studied master class on knitting booties for future athletes. By the way, these sneakers are also suitable for girls. You just need to prepare more delicate or bright colors.
If you want to also crochet booties, video lessons for beginners will help you in this wonderful and cozy task.
Crochet booties: patterns for beginners with descriptions
You have already watched video tutorials and master classes on knitting beautiful and stylish booties. We also want to show you several diagrams with detailed photos and a full description of the process so you can knit cute booties for your little miracle.
Openwork booties for beginners
Pregnancy is undoubtedly the most wonderful time in a woman’s life, because at this time she is waiting to meet the dearest and most beloved person in the world - her baby. While on maternity leave, most expectant mothers find themselves with a lot of free time, because many activities are contraindicated “in an interesting position,” and others, like watching films about childbirth, quickly become boring. What to do with yourself while waiting for your child to be born? We will be happy to suggest an option for an attractive handicraft - knitting! And in order for it to be useful, we offer instructions for “booties: diagrams and descriptions.”
Knitted booties for beginners

If you have not yet switched to knitting needles or don’t know them at all, start getting acquainted with knitting baby booties. On the Internet you can find a large number of descriptions and patterns for knitting them - from the simplest to the most complex, with ornaments and patterns.
Preparatory work
In order to make your baby’s first soft, comfortable “shoes” with your own hands, you will need:
- Yarn for children's knitting (fifty grams). If you take a different yarn, the booties may turn out to be rough, prickly, and some threads may cause allergies in the child, so you need to approach the choice of material responsibly. You should give preference to medium-thick threads; they will make the product more accurate, and it will be easier for you to work with such yarn.
- Two size 2 knitting needles (you can use a size 3, in which case the knitting will be looser).

The size of the knitting needles is determined in millimeters, where size “2” is two millimeters, “3” is three and so on, respectively. But there are non-standard knitting needles, for example two and a half or three point seventy-five hundredths. They are suitable for working with certain types of yarn.
If you take the yarn and cannot decide on the size of the knitting needles, you need to attach the knitting needle to the thread. The ideal option is when the thickness is the same, or the thread is a little thicker. The knitting density depends on this ratio, however, non-professionals should not choose thin knitting needles, as the slightest flaws will be visible on the product.

Before proceeding to the manufacture of the product itself, it is necessary to check the tightness of the knitting. With the right material and knitting needles, knitting in stockinette stitch ten by ten centimeters will result in thirty-seven rows of twenty-eight each.
If you plan to wash the finished product, after performing the density test, wash the knitted square at a temperature of thirty degrees. If the quality of the selected yarn is high, the size and shape of the piece should not change. If the square “crawled,” it is necessary to take into account the resulting error in the actual production of booties.
Product diagram

When you knit the twelfth row, there should be sixty-four loops on the knitting needle. After this, the expansion ends, we knit rows without a crochet.
From the thirteenth to the nineteenth row (inclusive) we knit with stockinette stitch (both even and odd rows) behind the back wall.
The twentieth row falls on the wrong side. Here we need a hook (preferably a thin one, so as not to damage the yarn and not pull out excess threads). Using a hook, we knit the twentieth and thirteenth rows together, knitting (pull the thread simultaneously through two parallel loops - the 20th and 13th row).
From the twenty-first to the twenty-eighth inclusive, we again knit only with facial loops.
In the twenty-ninth row we knit the first thirty-six stitches, then there will be a decrease. We remove the thirty-seventh loop without knitting, knit the next one, throw the removed loop over the knitted one and turn.
In the next row we remove the first loop, do not knit it, the next eight will be purl, the tenth and eleventh we knit together purlwise and turn.

Thirty-first row. We remove the first loop, knit the next eight, slip the tenth, knit the eleventh, throw the tenth over the knitted one, turn again.
The next fourteen rows repeat the last two, where all even rows are identical to the 30th (32nd, 34th, 36th, 38th, 40th, 42nd, 44th), and the odd rows are identical to the 31st (33rd, 35th, 37th, 39th, 41st, 43rd, 45th).
The forty-sixth row repeats the thirtieth.
In the next row we remove the first one, and knit the rest using the front method.
Forty-eighth row: knit seventeen, knit the next two together, purl the next eight, slip one, knit one, throw on the removed one, turn and knit the next seventeen stitches.
There should be forty-four loops left on the knitting needle.
Knitting the next row
Next row: knit twenty-four, turn, purl four, turn, knit four, turn.

We knit the remaining four loops only in stockinette stitch until we get six centimeters in height. Let's close this segment.
There should be twenty loops left on each knitting needle, on each side.
On one side we cast on fifteen loops (weaving along the strap of four loops), turn, and close the next twenty-six loops. There are nine left that need to be removed on an additional knitting needle.
We cast on fifteen loops in the same way on the other side (along the strap of four loops), make the next twenty knit stitches.
The nine loops that we left on the extra needle are the heels. For now they remain that way. Cast off the remaining twenty-six loops.
Make seams on the sole and heel. We knit the next eighteen in the knit method, and pick up another twenty-two.
The next row is completely knit, at the end we get four loops.

The next one is also a knit stitch, when there is a remainder of three stitches on the knitting needle, we need to make a hole for the button. Yarn over, knit the next two stitches together, knit the last one.
We knit two more rows completely with knit stitches.
We close all the loops. From the six-centimeter piece that we knitted earlier, we make a strap and stitch it. We pull the strap through it. We sew the button in according to the hole left for the button.
Both of the pair of booties are knitted identically. The finished product can be decorated with a separately knitted flower, a bow, or sewn on ribbons.
The simplest and most beautiful crochet booties

An excellent alternative to knitting is crocheting. Many needlewomen note that it is much easier to master crocheting than knitting, and the products turn out no worse, even cuter and more delicate.
The proposed pattern for knitting booties is designed for small feet up to ten centimeters in size. Finished slippers, with correctly selected thread and loose knitting, stretch a little. The proposed booties are suitable as a replacement for warm home socks for a baby.
The entire product can be knitted with one color of yarn, but in the proposed pattern two are used to make the booties more fun and bright.
Preparatory work
- Yarn. When choosing a material for knitting, it is important not to make a mistake, so that the baby is comfortable in the finished slippers, and you do not experience any inconvenience during the manufacturing process.
- Yarn of a different color. The quantity depends on the selected element that you want to knit to decorate the booties.
- Hook (size measured in millimeters) - three or four.
- A large gypsy needle with a wide eye or a thin hook (depending on what is at hand, the quality of the product does not depend on it).
- Good scissors (will be used to cut the thread). Since acrylic threads are quite strong, you need to use sharp scissors.

We will start knitting from the sole. In the proposed model of children's house slippers, the sole is oval. It is also necessary to note that the choice of the location of the heel and toe depends on the artist.
The first row will be represented by nine air loops plus the tenth, which will serve as a transition to the next row (lifting loop).
In fact, the first row is a row of cast-on stitches. As a rule, it is considered zero. Therefore, it is correct to start counting from a row that is directly knitted.
First knitting row. From the first loop (starting from the row of the set, this will be the ninth loop) we knit three half double crochets (we make a yarn over the hook, insert it into the ninth loop, pull the working thread, we get three loops on the hook; pull the working thread through all three loops at the same time, repeat three times).
We also knit the next seven loops with half double crochets, one half double crochet from each loop.
From the extreme loop of the zero row you need to knit six half-columns.
The row is closed by connecting the outermost half-column and the first air loop. The first row should total twenty-six stitches.
In order to knit the second row and the sole of the product, you need to cast on two connecting (air) loops.
From the first six loops of the row we knit two half-columns. Next, from each lower half double crochet (there are seven in total) we knit another one. At the end of the row we get thirty-eight loops.

We continue to work
The third row begins with two air loops that serve as a lift. We knit a half double crochet into the second chain stitch. We knit all subsequent loops to the end of the row with half double crochets (one from each loop of the row).
We get an oval-shaped sole. The third row will be the final one for this part of the product. We knit its outer loop with a connecting post. To do this, we pull the working thread through the air loop on the hook and the first loop from it - we connect the two into one.
When the connecting post is knitted, we will get forty loops in the row.
The absence of posts in the third row will make the sole quite stable.
The fourth row will be the base of the vertical wall. We start by casting on two air loops. All subsequent stitches in the row must be knitted with half double crochets (one half double crochet from one loop).
It is important to grab the working thread through the back wall of the loop. If you work behind the front wall, the product will look inside out.
We finish the row with a connecting loop. Starting from the fourth row, you need to make sure that the knitting is as tight as possible. This is necessary so that the vertical part of the future shoe is level.
We start the fifth row with two air loops. Next, from each loop of the bottom row we knit a half-column cap. There should still be forty loops.
We finish the outer row of the side of the booties with a connecting loop. Cut the working thread with scissors and bring it out with a hook or needle to the inside of the slipper.
We knit the rise
We knit a rise. First you need to determine the middle loop of the resulting oval. From it in each direction you need to count nine loops (along the wall of the booties).
We fold the working thread in two layers and attach it to the tenth loop from the starting point. We knit three air loops.

Upon completion of the set of eighteen half-columns, we pull the thread simultaneously through all the loops remaining on the hook.
We attach the working thread with a connecting loop and knit three air loops. We fasten the outer loop with the nineteenth loop of the slipper column.
We cut the working thread with scissors and bring it to the inside of the booties.
Decoration. From the second color of yarn we crochet a product to decorate booties. It can be a bow, a flower, a heart or a ruffle, depending on the taste of the master. Using a needle, attach the decoration to the central part of the slipper.
In this article you will find a detailed step-by-step master class for those who want to knit openwork booties using a crochet hook, a knitting pattern with a description and links to video tutorials on this topic.
Booties are the first shoes a baby gets. This is an important wardrobe item that will warm the baby’s feet and prevent rompers and tights from sliding down. Knitting booties with your own hands opens up a lot of scope for imagination and the result can become a whole work of art!
We will start our step-by-step master class with a story about what is needed to knit openwork booties.
How to crochet openwork booties in a step-by-step master class with your own hands
So, we will need:- Cotton threads or acrylic yarn. Since these are shoes for a newborn baby, choose your yarn as carefully as possible. It should be hypoallergenic, soft and pleasant to the skin.
- Hook No. 1.5
- Satin ribbon
- Beads
- Art. b/n – single crochet
- Art. s/n – double crochet
- air loop - air loop
Many people believe that yarn must be natural. It's up to you to decide, of course. But natural wool often causes allergies in babies and this can become a serious problem.
Hypoallergenic yarns that are suitable for any baby include cotton, acrylic and microfiber.
It is better to knit summer and spring booties from cotton for warm weather and models for special occasions. Mercerized cotton has good thread twist and a pleasant shine.
Microfiber is a modern type of yarn, the threads of which consist of many individual fibers. These threads are soft and smooth to the touch, do not deform after washing and have a noble appearance. Such products will perfectly keep you warm in cold weather and cool in hot weather, so they are suitable for any season.
Acrylic is a synthetic analogue of wool yarn. There is no need to worry that these threads are not natural. They are much softer than wool and will definitely not cause allergies, unlike wool. Acrylic is suitable for autumn and winter booties.
Let's start working on the booties.If your baby is a newborn:
We dial 10 v/p and another 3 v/p lifts. Then from the 5th loop of the chain we knit st. s/n. Around the chain on both sides we knit 4 rows of st. s/n.
If your baby is already a little older:
You need to measure the length and width of your child's feet. Then subtract the width from the length. The resulting number shows how long the chain of chains for the foot of future booties should be. If you are knitting a product for everyday wear, allow a small increase for the baby's height.
We knit the sole of the booties according to the pattern below. At the end of each row there is a connecting loop, and the next row begins with three lifting chain loops.
Then you need to knit a series of purl stitches. b/n. To make them embossed, we insert a hook under the trunk of the posts, as shown in this photo:
The next step is to yarn over and pull out a loop.

Two loops have formed on the hook, we knit them together.
We finish the row according to the same pattern.
We begin to knit an openwork pattern according to the patterns.In the 1st row we type in / p, st. s/n, military grade, st. s/n into the same loop of the bottom row, skip two loops of the bottom row and continue knitting according to the same pattern.
Knit the second and third row in the same way as the 1st.
We begin to form the toe. Mark the center of the side of the bootie. We knit a connecting post and three high rises to the center.
In the next 3 loops of the bottom row we knit according to st. s/n and knit them together.
We knit in the same way to the end of the row. Let's start the work again.
We cast on 2 high rises, yarn over, insert the hook under the loops of the bottom row. Yarn over again, pull out the loop and yarn over again.

We repeat this pattern until the end of the row.
We knit all the loops on the hook at one time and cast on three more chain stitches.
We knit one row with openwork knitting.
We knit the next row into which the ribbon will be pulled like this: st. s/n, v/p, skip one loop of the bottom row, st. s/n in the next stitch and so on.
We unfold the product and continue working from the inside. In Art. s/n of the bottom row we knit two tbsp. s/n with v/p between them. The top edge should flare out.
Let's knit st. b/n in arc
In the next arc - 3 tbsp. s/n, pico from 3 VP and 3 more tbsp. s/n.
In the next arc again st b/n.
We repeat the last three points until the end of the row (st. b/n in an arc, in the next arc - 3 tbsp. s/n, pico from 3 v/p and another 3 tbsp. s/n, and so on).
We sew on the beads and insert ribbons, as shown in the photo:

Booties for your baby are ready!
Let's look at another example of knitting, which will pleasantly surprise novice needlewomen with its simplicity of execution, and such booties will look no less impressive than in the previous example.
Let's try to make beautiful two-color openwork booties

We provide all the diagrams of this example with detailed descriptions, so it won’t be difficult to understand them.
For this model we will need acrylic yarn in 2 colors (in our example, pink and white), a satin ribbon and the same hook No. 1.5.
We knit the sole according to the same pattern and description given at the beginning of the previous example.
We knit the side of the booties.Knit 1 row of st b/n and increases, grabbing not by the base loop, but wrapping around the column of the previous row (the hook is inserted from the inside from right to left, wrapping around the st. of the previous row, the thread is picked up and pulled out on the wrong side, knitted st. b/n ).
Next we knit three rows of st. s/n without adding loops.
The bootie toe pattern looks like this:

We fold our work in half lengthwise and find the center of the cape. To the left and right of it we put 19 loops and mark with a thread.
- We knit the top of the cape according to the pattern from the previously marked loop in the middle of the side part:
- For 1st row: 3 single stitches on the rise, 7 tbsp. s/n, (2 tbsp. s/n, knitted together, tbsp. s/n) - repeat 8 times, 7 tbsp. s/n. Grab the back wall of the loop. Unfold the knitting.
- For row 2: 3 ch on the rise, (1 ch, 1 treble s/n in the second loop) - repeat 15 times. Unfold the knitting.
- For row 3: 3 single rises, 7 tbsp. s/n, (2 tbsp. s/n, knitted together) - repeat 7 times, 9 tbsp. s/n. Unfold the knitting.
- For row 4: 3 single rises, 8 tbsp. s/n, 7 tbsp. s/n knit together, 8 tbsp. s/n.
- Fold the left and right parts of the toe and the wrong side. Knit the 8 outermost loops that are not closed together with connecting stitches.
For 1st row: 3 high rises and then in a circle st. s/n. When moving from the toe to the side of the bootie, we knit 2 tbsp. s/n together (with one vertex). We close the row with a connecting loop.
For row 2: 3 ch raises, (1 ch, 1 treble s/n in the second loop) - repeat to the end of the row. We close the row with a connecting loop. We will insert a lace or satin ribbon into this row.
For row 3: 3 high rises and then in a circle, st. s/n. We close the row with a connecting loop.
For the 4th row: v/p for lifting, (1 v/p, 1 st. s/n in the second loop) - repeat to the end of the row. We close the row with a connecting loop.
Tie the sole and toe of the bootie around the perimeter with white yarn: (3 chain stitches, 2 connecting loops).
We tie the cuff with white threads, as shown in the diagram:

Knit 4 tbsp. s/n along each side marked with an arrow.
Insert a white satin ribbon and tie it in a bow.
For those who want to analyze this topic more clearly and learn something new, we have prepared a selection of video tutorials on crocheting booties.
Video on the topic of the article
Not everyone can crochet booties. This requires patience and some basic knitting knowledge. Therefore, if you decide to please your “little miracle” with a new thing made by yourself, we will teach you how to crochet booties beautifully and correctly. Booties for beginners - this will be the first part of a large lesson, then we will move on to more complex models.
Crochet lessons for beginners (patterns with step-by-step descriptions)
This part of the article can be called “training for dummies or how to quickly and easily crochet booties.” For beginners, this is a real find, as a large number of photos, videos and step-by-step instructions will help you understand this difficult matter. So, a master class on “how to learn how to knit the simplest booties.”
The simplest booties for baby (a lesson for beginner needlewomen)
If you learn how to knit the simplest patterns, you can get creative and turn them into funny little animals (monkeys, bunnies, lambs, bears), interesting fruits (strawberries, apples). You can also just beautifully tie the edge or decorate the socks, which will go beautifully, for example, with a headband and, voila, a chic set is ready.
Lightweight models for the summer or for home can be made with felt soles.
Popular articles:
For this model (sole size 10 cm) you need soft yarn (100% acrylic, 50 g/200 m) in 2 colors.
We dial 12 v.p. + 3 v.p. (total 15 ch), insert the hook into the 4th loop of the chain from the hook and knit 3 rows according to this pattern.
Having knitted three rows, we move on to another color.
4th row - in each column (back) we knit a single crochet loop. The result should be 56 loops.
We knit the 5th one in the same way. The result will be two rows knitted with white thread.
Again we switch to blue. We start by knitting a “bump” (2 chain stitches, after 2 unfinished stitches, then one chain stitch).
We skip one loop and make a “bump” again.
So knit a whole row and close. We knit the 7th in the same way as the 6th.
We close the row and break the thread. Having marked the middle, we begin to knit the toe with a white thread.
Insert the hook into the back wall of the loop and knit a white “bump” from two unfinished loops.
Turn it over and also knit “bumps”.
There should be 7 pieces, after which you need to connect them.
Finish the row in the same way.
2 more rows and switch to blue again.
We decorate the edge by knitting three air loops for each column.
Master class with a detailed full description (step-by-step photos)
Step by step you learn the basics, which help you move on to more interesting models. When you start from scratch, all the little useful secrets help you move forward quickly, so I suggest moving on to more complex booties with a hook for beginners with a step-by-step description.
Knitted sneakers for children
Handmade Adidas sneakers will be appreciated by true gentlemen.
For this “masterpiece” you will need thin white cotton yarn (100% cotton, 50g/150m), hook No. 2 and 3 hours of free time.
We start with the sole. The sole is knitted according to this pattern.
The sock is knitted from the front 30 stitches. 1 row - single crochets, 2 - double crochets (3 loops and one top). There should be 10 loops left.
We connect all 10 columns, move the thread to the beginning of the row and knit 2 rows of single crochets.
7 rows - double crochets.
The tongue ends with three rows of white thread. Then you can tie the product around the perimeter.
We embroider the logo and thread the lace. Ready!
DIY summer sandals for a child
If you love children's knitted sandals for the summer, by learning how to knit soles, you can come up with a lot of ideas and create a large number of interesting models.
Fold the sole in half and find the middle at the toe. The middle should be 5 columns. Tie a thread with a regular knot and tie 13 air loops, then attach it to the opposite side of the spout using a half single crochet (dc). Next, knit according to pattern 2 (only what is indicated in blue and dark red). The nose should look like in Fig. 3. Do not break the thread. In the last row you attached 2 half-columns bn to the sole.
Next:
1st row: 3 vp, attach them to pst.b.n. to the strap (skip 3 dc). Work 34 treble stitches. n. and also attach pst. b. n. to the strap.
2nd row: 1 vp and the entire row of st. b.n. = 35 st.b.n.
3rd row: Again 3 v.p. and 34 tbsp. With. n., 4 v.p., 3 tbsp. S.N. in the middle of the strap, ch 4
Next is a row of arches for the ribbon. 5 v.p., st.s.n. through 1 st.s.n. previous row. Senior s.n., 1 v.p., st.s. n. repeat the entire row in a circle.
Start the next row with pst. b.n. in an arch, 4 vp, dc, 1 v. p., senior senior sciences again in the arch. And so the whole series.
Children's shoes for girls (crochet)
Christening dresses or an openwork hat will look chic when paired with crocheted shoes with beads. Make them into ballet shoes or moccasins. The most important thing is that the yarn is soft and pleasant for a child’s feet.
Crochet booties for beginners with step-by-step description (crochet).
You can take any cotton threads you like and a No. 2.5 hook. We start with the sole (look at the diagram below).
If you have a hard time navigating the diagram, I suggest you go into more detail at this stage.
We cast on 17 air loops (we start knitting from the 3rd).
1st row: 7 single crochets, 7 single crochets, 7 single crochets in the last stitch (and continue to knit on the other side of our chain), 7 single crochets, 7 single crochets, 4 single crochets in the last stitch, connecting stitch .
2nd row: 3 chain stitches, double crochet in the same base. 14 double crochets, (2 double crochets from one loop) - 5 times, 16 double crochets, 3 double crochets from one loop, 4 double crochets from one loop, 3 double crochets from one loop, connecting stitch.
3rd row: 3 chain loops, 15 double crochets, (2 double crochets from one loop, double crochet) - 2 times, (3 double crochets from one loop) - 2 times, (double crochet, 2 double crochets double crochet from one loop) - 2 times, 16 double crochets, (2 double crochets from one loop, double crochet) - 2 times, (3 double crochets from one loop) - 2 times, (double crochet, 2 double crochet from one loop) - 2 times, connecting stitch.
Row 4: chain stitch, tie the entire row with single crochets, ending with a connecting stitch.
Row 5: 3 chain stitches, knit the entire row with single crochets behind the back half-loop of our sole, ending the row with a connecting stitch.
Row 6: 3 chain stitches, knit the entire row with double crochets, ending with a connecting stitch.
Let's move on to the white thread.
7th row: 3 chain stitches, 15 double crochets, (we knit 2 double crochets together with a common top) - 10 times, finish the row with double crochets, ending with a connecting stitch.
Sew on a bow, buttons and beads.
Video tutorials - knitting booties for newborns
So, the most interesting ideas for a fashionable baby.
Beautiful “Crocodiles” booties in one evening
Such patterns are knitted very quickly and easily despite the scales.
Warm boots (ugg boots)
We will create high boots or boots made of wool yarn (grass can be used) for colder times. They will look very cute on a baby who is only a couple of months old.
Princess ballet shoes
MK - Sneakers for boys
Unusual white openwork “Raphael” for mom’s doll
Cozy “Minions” slippers for kids
Stylish “Marshmallows”
New Year's ideas "Santa Claus"
The most sincere emotions can only be felt towards a loved one. And especially to the little person - your baby, who so needs care and tenderness. Lullabies until late at night, carefully washed onesies, feeding by the hour... A young mother needs to know so much and so many things to learn! I present to your attention a knitting master class crochet booties for beginners. Let your child’s first shoes be not only warm, but also beautiful and very soft!
Small, neat booties, knitted with your own hands, will be another contribution you make to caring for your baby. And if you don't know at all, how to crochet booties, no need to run to the store to get them - in this master class I will explain everything step by step with photographs and descriptions of knitting! And all you have to do is choose the desired color of thread - and delicate booties, knitted by the caring hand of your mother, will warm your baby in his first months of life.
These knit up pretty quickly! Let's start knitting!
For the work, I used Pekhorka “Children’s Novelty” yarn (100% acrylic, 50g/200m) in two colors blue and white and a hook No. 2.5.
We dial 12 v.p. + 3 v.p. (total 15 ch), insert the hook into the 4th loop of the chain from the hook and knit 3 rows according to this pattern.
You can watch a detailed master class on knitting such an oval
We finish the 3rd row with a connecting post using a white thread.
4th row: with a white thread we knit st. b/n, inserting the hook behind the back wall of the loop.
we finish the row of connections. Art.
5th row: in each loop we knit st. b/n,
We close the row of connections. Art. blue thread.
Row 6: knit a “bump” from 2 vp.
*skip 1 ch. and knit a “bump” from 3 unfinished stitches. s/n
(You can watch a lesson on crocheting “bumps”)
Repeat from * to the end of the row. We close the row of connections. st., inserting the hook into the top of the “bump”
7th row: knit the same as the 6th row
“a lump of 3 tbsp. s/n” we knit at the top of the “bump” before. row
We close the row of connections. Art. and break the thread.
We make the initial loop with a white thread.
I knitted my booties for a 10 cm leg, marking the middle I started knitting the toe
insert the hook behind the back wall of the top of the “bump” and pull out the initial loop,
to the next top of the “bump” before. row we knit a “bump” from 3 unfinished stitches. s/n
We knit to the middle of the bootie, I got 14 “bumps”
turn the knitting over and knit a “bump” from 2 unfinished stitches. s/n and 2 v.p.p.
*skip 1 loop and knit a “bump” from 3 unfinished stitches. s/n*
repeat from * to the end of the row (in this row we have 7 “bumps”)
knitting connection st., connecting the tops of the “bumps”, like this
knit 1 ch. and a “bump” of 3 unfinished tbsp. s/n (we insert the hook into the leg of the outer column of the “bump”),
knit 1 ch again and a “bump” (we insert the hook into the leg of the outermost stitch of the next “bump”),
knit 1 ch, and a “bump” at the top of the “bump” of the 7th row,
We close the row of connections. st., inserting the hook into the top of the “bump”
Similarly to the 7th row, we knit 2 more rows.
We close the row of connections. Art. blue thread.
We knit st. b/n in each loop and 3 vp. between them
We close the row of connections. st, carefully hide the ends of the threads. And our bootie is almost ready. All that remains is to tie a cord from VP. (I got 120 vp).
We will knit the second bootie in the same way! Now your baby's feet will be warm!