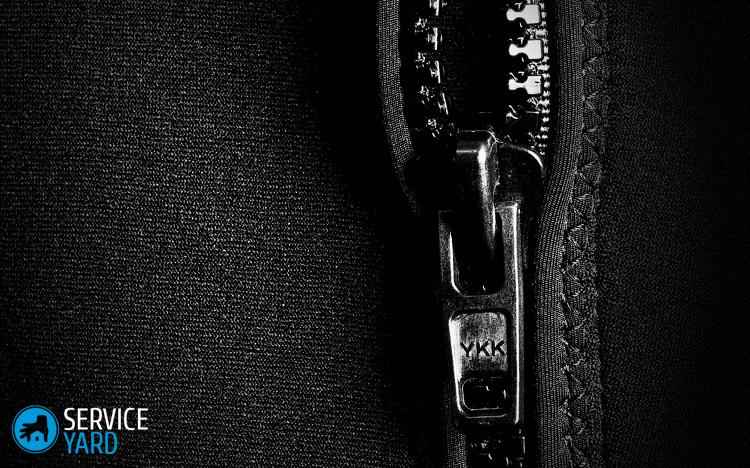
A hidden zipper differs from a regular zipper in that its slider is located with reverse side from the cloves, and the cloves themselves can be folded open. It is the hidden zipper that will allow you to make the fastener on the back of a dress or skirt as invisible and neat as possible.
Our master class will tell you in detail how to sew hidden zipper and will also introduce you to general rules working with this type of fastener.
Hidden zipper: basic installation rules
Despite the fact that a hidden zipper is almost invisible from the front side of the product, always choose the color of the fastener to match the fabric: the zipper slider will still be noticeable, and in addition, the product should look professional from the back side. Before installation, be sure to iron the base of the zipper with steam or wash it and then iron it - this will avoid possible shrinkage and tightening of the fabric of the product. It is advisable to strengthen the seam allowances into which you will insert the zipper, especially if your fabric frays a lot or is cut on the bias. It is best to use a special non-woven edge.Always pin, baste and stitch the zipper with the garment from top to bottom.
There are two opinions about at what stage you need to sew a hidden zipper: into an open seam or into an already stitched one. We recommend not sewing up the main seam or, as a last resort, leaving a few centimeters of the seam unsewn before starting the fastener.
Most modern sewing machines come with a special foot for sewing on zippers. However, there is also a special foot for sewing on a hidden zipper, and if desired, you can buy it at a sewing accessories store.

Both metal and plastic feet are available for sale. Plastic feet are cheaper, on the other hand, the metal base is more reliable. There will be no scratches on it, which can then impair the sliding of the foot along the fabric. Although a special foot greatly simplifies the work, you can still achieve good results with a simple foot. So, let's learn how to sew a hidden zipper!
Progress
On loose, stretchy or bias-cut fabrics, reinforce the edges with a non-woven edge. Sew using an overlocker or zigzag. Baste the entire seam of the product into which you will sew the zipper.

Press seam allowance. Place the zipper on top of the seam allowance so that the teeth line up with the center seam. The slider should be 1 mm below the intended edge of the product.


Baste the zipper to the fabric in the middle of the braid, catching only the seam allowance of the product. Pull the pins and center seam basting out to the end of the zipper. Open the zipper. 
Insert the zipper foot. Set the needle to the far left position. Bend back the teeth and insert the needle as close to the teeth as possible. If you have a foot specifically for a hidden zipper, it will unscrew the teeth itself.

Sew along the entire length of the zipper until the foot rests on the zipper. Make a fastener. Sew the other half, moving the needle to the far right position. Close the zipper. If the zipper peeks out, lay another line, even closer to the teeth.

Now sew the main seam under the zipper. Place the needle to the far right. Start the seam 5-10mm above the end of the zipper stitch. Insert the needle, stepping back from the zipper seam by 1 mm.

Finish the seam to the bottom of the product. Press the seam allowances from the wrong side.
The zipper is a small invention that has simplified the process of sewing and further use of clothes tenfold. Today, its varieties are made from plastic, polyester, metal and with braid of various densities and thicknesses.
A classic, elegant and functional lock consists of several elements:
- “dog” with a ring - a part that moves along the line of the lock, closing and separating its links;
- teeth - links that provide a tight connection;
- a strip of material (braid) on which teeth are attached along the edge;
- rivets are elements that prevent the “dog” from sliding off the end of the line: two on top, one on the bottom on one-piece models, another pair on detachable models.
If you are going to sew a zipper yourself, you need to choose the appropriate type, depending on the purpose of the item and the type of fabric for it.
How to choose a zipper for a product
- For windbreakers, raincoats, and a dress made of thin fabric, a model made of plastic and synthetics will go well. It is flexible, lightweight, not afraid of moisture, and does not corrode like untreated metal.
- In heavy, warm clothes, jeans, things for active rest or sports, it is better to sew in metal varieties. They are more durable, the teeth reliably “hold” each other and withstand increased tension.
- Hidden zipper. A model with small parts, usually made of plastic/synthetic materials, it is used where deliberately noticeable locks are undesirable.
A secret version of the lock is often introduced into women's clothing. It is with this that craftsmen have more difficulties when sewing. The main problem is to make it truly invisible, as it should be, based on the name. To do this, the element is placed in a seam, which is assumed by the design of the product.
premera74.ru
Methods and features of sewing secret locks
The hidden fastener is sewn on, precisely and consistently, step by step. You need to properly fasten all its parts and carefully work with the fabric, taking into account its parameters: how thin it is, whether the edges are fraying, etc. Then the finished item will be aesthetically pleasing, and the lock will be invisible and firmly attached to the clothing.
Before you sew on a hidden zipper, you need to choose a place for it:
- in the middle of the front - this is how hidden fasteners are placed less often, mainly on tops and dresses with a cut-off waist;
- in the side seam - here it is important to be especially careful in your work so that the side does not bend after sewing the zipper to the skirt or dress;
- on the back along the central seam - a universal method that is equally suitable for thin and dense fabrics.
If you know how to sew in hidden fasteners, you don’t even have to choose them based on the shade of the product. They will be completely buried in the seam and will look like its continuation. The peculiarity of such locks is that the stitching on the front side is invisible. When purchasing a part, you need to first measure the cut for it. It should be at least 2 centimeters longer.
Having studied how to properly sew a hidden zipper in the video, you will notice that the craftsmen work on machines with a special foot. It is often included in the standard set of components for equipment, but you can also purchase it separately - a universal model or a copy that is exactly suitable for a specific sewing machine. An overlocker will also come in handy - finish the seams before sewing in the fastener. If you don’t have the equipment, you can use silk bias tape.

youtube.com
Sequence of stages
The fastener must be inserted into the seam when the sections are completely open. Don't forget about allowances: 1.5 centimeters wide is enough. Before you sew in a zipper, you need to mark its line with tailor's chalk, a disappearing marker, or a pointed bar of soap. The clasp is opened and placed with the front side on the allowances of the dress along one edge of the cut. Make sure that the teeth coincide with the axis of the middle of the back if you insert an element along it.
You need to sew in the lock by turning the middle seam allowances to the wrong side and then pressing them. There is no need to iron them. Be sure to determine the distance from the edge of the braid to the middle cut of the material. It will be equal to the width of the seam allowance minus 1 centimeter.
Progress
- Use your index finger or thumb to bend the teeth so that the seam space between them and the braid becomes visible.
- Pin the upper end of the braid onto the seam allowance - you need to step back a small distance from the upper edge of the product.
- Place the lower end of the tape so that it protrudes beyond the lower level of the cut.
- Place the machine foot over the ribbon - the spiral should be under the notch, on the right side of the needle.
- Sew a lock from the top to the mark on the cut and close it.

obnov-ka.ru
The stitch is completed when the foot rests on the dog. The second side of the tape is placed with the front side on the allowance along the outer surface of the fabric of the product - along the cut on the other side. The upper end of the braid is pinned. Then the “structure” is opened again.
Progress
- Place the machine foot over the ribbon - now the spiral should be under the notch on the left side of the needle.
- Secure the tape from the top to the mark along the cut.
- Close the lock.
To properly process the open seam on the back and sew the cuts on the parts, you need to step down from the mark on the cut and unscrew the lower free end of the lock to the seam allowances. It is started as close as possible to the last stitch on the set seams. It is best if the line “overlaps” the stitching line of the lock and is on the left side, at a distance of 1 millimeter.
While working, you need to hold the end of the lock. The most convenient foot for surgery is a single-armed one. The ends of the tape are cut off and edged with fabric, and it is better to secure the ends of the stitching with a double knot for reliability. You will also need to iron the seam allowances on the finished area.
Features of sewing hidden fasteners into parts made of thin fabrics
When choosing a location for the fastener, you need to remember that it will look different on fabrics with different characteristics. For example, it is better not to insert a zipper into the side seam of a dress made of thin, light and delicate material - the flank may “lead”. In this case, the center line of the back will be a more practical and easier to implement option. If the material is loose or airy, the seam allowances should be additionally reinforced with non-woven fabric.

season.ru
On items made of particularly thin fabric (such as chiffon), it is not recommended to sew zippers in one layer. There is a danger that it will pull back the material or become noticeable. Therefore, a special lining is needed. Along the zipper line it is fastened to the main fabric, and below the end of the zipper it is left free to maintain the flowing hemline.
How to make a French seam below the end of the lock:
- fold the pieces of light main fabric with the wrong sides facing each other and stitch, retreating from the cut at a distance of about 7 mm;
- bring the line to the end of the tape - to the edge at the allowance (you don’t have to make cuts along the bulk material);
- trim the allowances and press the seam so that they remain on the inside;
- lay the line straight, retreating from the edge up to 7 mm and finish it 30 mm further than the first;
- Press the seam allowances in one direction, and press above it.
You will need to make a French seam along the cover - there should be a transverse bartack at the end. On the lining, the allowance is cut to connect the two types of fabric. That’s why the fastener is needed - it will prevent the edges from “spilling out.” With a little practice, you will be able to sew hidden zippers onto dresses, skirts and other items, no matter the fabric, and add a useful skill to your professional tailoring arsenal.

The zipper lock is a unique invention that has been used for many years in sewing clothes and for repairing things. Today it is produced from the most different materials, for example, metal, plastic and polyester, in addition, may have different thickness and density. Many craftswomen often come across these products during their work, but not all of them know how to sew a zipper with their own hands correctly, which is why various difficulties arise. Today we will try to understand this problem, tell you how to choose the right zipper and install it.
Zipper-lock device
Before you sew in a zipper yourself, you need to understand what it consists of in order to install it correctly. This is very important, since its service life directly depends on the correct selection of this device.

A classic functional elegant lock consists of the following elements:
- Dog with a ring. This part moves along the line of the lock, disconnects and closes its links.
- Cloves. Simply put, these are the links that provide the tightest possible connection.
- A braid or strip of material. It is to this that the teeth are attached along the edge.
- Rivets. These special elements prevent the pawl from sliding off the end of the line. As a rule, there are two rivets on top; on split models there is only one on the bottom.
If you decide to sew a zipper with your own hands, then you should choose the appropriate option, depending on the type of fabric and purpose of the clothing.
How to choose a zipper for a product?
Before sewing a zipper with your own hands, it is recommended to correctly determine the appropriate fastener option for a particular case.

Rules for choosing a zipper, depending on the purpose of the clothing:
- For raincoats, windbreakers, and dresses made of thin fabric, it is better to purchase synthetic or plastic fasteners. They are lighter, more flexible, not afraid of moisture, and do not corrode, unlike untreated metal products.
- Metal zippers are suitable for warm, heavy items, denim trousers, sportswear or activewear. They are distinguished by high strength indicators, all teeth reliably adhere to each other and withstand maximum tension.
- Concealed zippers. Models with small elements made of synthetics and plastic are ideal for cases where you do not want the locks to be visible.
Important! The secret option is most often used for women's clothing. But it is precisely with him that, as a rule, craftswomen experience greatest number difficulties. The hardest thing is to make the zipper truly invisible; it should be located in the seam.

Features and methods of sewing in hidden zippers
Hidden fasteners must be sewn clearly and consistently, performing each step efficiently. It is important to securely fasten each element and work with the fabric as carefully as possible, while taking into account its basic parameters. For example, in materials that are too thin, the edges crumble, making the finished product look unsightly. Before sewing a hidden zipper with your own hands, you need to correctly determine the place to secure it.

There are several basic sewing methods:
- Front in the middle. Such hidden fasteners are rarely found, more often they are placed on dresses with a cut-off waist or on tops.
- In the side seam. In this case, it is important to be as careful as possible so that the side does not bend after the zipper is sewn.
- Centered on the back. This is a universal option; it can be used for thick and thin fabrics.
Important! If you know how to sew in hidden zippers correctly, then it is not at all necessary to match them to the color of the product, since they are completely recessed into the seam and look like a continuation of it. The main feature of such locks is that the stitching on the front side is invisible. Before purchasing a part, you must first measure the cut for it. Ideally, it should be 2 cm longer.

How to sew a zipper yourself?
When starting to sew in a zipper yourself, make sure that all the edges are open.
Important! Remember about the allowances - the width must be at least 1.5 cm.
The product must first be marked with chalk, a bar of soap or a disappearing marker.

Sew in the zipper according to the following scheme:
- Open the fastener and place it on the seam allowance with the right side along one edge of the cut. At the same time, carefully ensure that all the teeth coincide with the axis of the middle of the back.
- Turn the seam allowances to the wrong side and press them. Determine the distance from the edge of the ribbon to the middle cut of the fabric.
- Use your finger to bend the teeth so that the seam space becomes visible between the braid and the teeth.
- Pin the top edge of the braid onto the seam allowance. That is, step back a small distance from the top cut.
- Determine the end of the tape from the bottom - it should protrude slightly beyond the bottom edge of the cut.
- Place the presser foot over the ribbon, with the spiral located under the notch, to the right of the needle.
- Sew the zipper from the top to the mark, close it. Complete the stitch when the foot hits the dog.
- Place the other side of the tape facing the seam allowance outside matter. Pin the top edge of the tape with a pin. Open the structure again.
- Place the machine foot over the ribbon again, only now the spiral should be on the left side of the needle under the notch.
- Secure the tape along the cut from the top cut to the mark. Close the lock.
- Make an indent down from the mark on the cut, unscrew the free lower end of the lock at the seam allowances.
- Start the seam as close to the last stitch on the set seam as possible. The stitching should overlap the zipper stitching line and be positioned on the left at a distance of 1 mm. Always hold the end of the lock.
- Cut off the ends of the ribbon, make an edging with fabric, and secure the ends of the stitching with a double knot for security.
- Iron the seam allowances on the finished area.

How to sew a hidden fastener into a thin fabric item?
When choosing where the zipper will be located, remember that it looks different on fabrics with different characteristics:
- It is better not to insert a fastener into the side seam of a light, thin, delicate dress, otherwise it will pull it down. In such cases, the best option is the center line on the back.
- If the material is airy and loose, then it is better to additionally reinforce the seam allowances with non-woven fabric.
- It is not recommended to sew zippers in one layer on chiffon products, because the zipper can pull back the fabric or become noticeable. In such situations, a special lining is needed.
You will need to perform the following steps to sew a zipper into a particularly thin material:
- Fold the parts made from the main light fabric with the wrong sides facing each other, stitch them at a distance of 7 mm from the cut.
- Bring the stitch to the end of the tape to the very edge of the seam allowance.
- Trim the allowances and iron the seam so that they remain inside.
- Lay the line straight, retreating 7 mm from the edge, finish it 3 cm further than the first line.
- Press the seam allowances in one direction and press above the seam.
- Along the cover, make the same seam, at the end of which there should be a transverse bartack.
- Score the seam allowance in the lining to join the two fabrics together.
Video material
Now you know how to sew a zipper with your own hands. If you practice a little, then in the future you will be able to independently sew any locks onto skirts, dresses or items made from any fabric.
A hidden zipper is indispensable when you need a fastener that is invisible from the front side for a dress, skirt, or bag. It is not so easy to sew it in correctly without deforming the product. What do you need to know to sew a hidden zipper?
Features of a hidden zipper
The peculiarity of a hidden zipper is that it is hidden in the seam of the product, and only the slider remains on the surface. In the regular one it is located on the side of the teeth, in the secret one - on the reverse side. But don’t be confused, some regular zippers also have teeth hidden under the braid. You can distinguish it this way: in a hidden zipper, when open, the teeth are easy to bend, in other types - not.
How to choose the right hidden zipper? Pay attention to the width, type and density of the base material. The lighter the fabric of the product, the thinner the zipper is chosen. The length should be 2-3 cm longer than the planned length of the fastener.
Iron the zipper before working. If it is on a cotton ribbon, this is done with steam. The fact is that the zipper tape can stretch or shrink and wrinkle the fabric in the finished product.
“Hidden” foot for stitching
To sew a hidden zipper, a special foot is used, which allows it to be stitched as close to the teeth as possible. It is not always included with the sewing machine, but is sold in specialized stores. It differs from the usual one in the shape of the sole: on the surface of the product there are grooves or grooves for the zipper spiral.
To choose the right foot, take with you to the store any one that is suitable for sewing machine. Paws different models have design features:
- on the “leg”;
- with removable sole;
- with screw fastening.
They can also be metal or plastic. Metal models will last longer. Plastic is a less durable material. Over time, such a foot is deformed by the needle or the teeth of the machine bar, and its sliding deteriorates. But if the foot is needed for one-time work, then a plastic product will do.
What do you need for work
To sew a zipper you will need:
- zipper;
- chalk
- ruler;
- tailor's pins;
- needle and thread;
- "secret" foot.
Before starting work, check the tension of the upper and lower threads in the machine. If it is strong, then loosen it, otherwise after stitching the zipper will bristle.
Do not use needles and threads that are too thick for stitching.
Non-woven strips
It is not difficult to sew a zipper so as not to stretch the fabric. It is necessary to glue the seam allowances in the place where the zipper is inserted using non-woven strips. For this purpose are intended:
- formband - oblique non-woven tape with a central stitch, which is used on oblique cuts or for knitwear and is glued so that the central line coincides with the seam markings;
- contentband - a non-woven adhesive strip, cut in a straight line, which is glued beyond the seam markings by 1 mm.
If there is no formband or contenband, strips are cut from non-woven fabric: for oblique cuts and knitwear on the bias, for straight ones - in a straight line.
How to properly sew a hidden zipper
To sew in a hidden zipper, a series of sequential steps are performed.
The first stage is preparation
- Measure from the inside 1.5 cm from the cut of the fabric and draw a chalk line on both sides.
- Glue strips of non-woven fabric - formband or contenband - to the seam allowances at the stitching site. If the fabric is rough and dense, you can do without interlining.
- Baste the seam along the markings.
- Seal the edges with an overlocker or by hand.
- Iron the seam. In this case, first iron the seam on one side, and then iron it on opposite sides.
Second stage - basting
- Place the closed zipper in the center to the stitching point, make chalk marks on the seam allowances and the zipper tape symmetrically on both sides in two or three places. You will need them to sew the zipper more accurately. The top of the fastener should line up with the top seam mark for the waistband for the skirt or neckline if it's a dress.
- Insert pins along the marks across the fastener and fasten the zipper with the seam allowances under the teeth.
- Baste the zipper over the seam allowances, piercing only one layer of fabric.
- Remove the pins, remove the seam basting, and open the zipper.
The third stage - stitching
- Sew the zipper on the machine using a special foot until it rests on the fastener. If there is no special foot, use a regular one. Then you need to manually bend the zipper spiral and make sure that the seam goes as close to the spiral as possible without damaging it. If you have little experience, then it is better to attach both sides from above to prevent distortion.
- Close the zipper and make sure everything is done correctly.
- Continue the side seam so that the bottom bartack is not visible. It should be 0.5-0.7 cm below the end of the seam.
- Remove basting.
How to sew in a hidden zipper - video
Features of sewing in a hidden zipper
Depending on the specific product, fabric, cut and place of stitching, there are some nuances. Below are different options for sewing in a zipper.
Bag, pillowcase
The easiest way to sew a zipper into a bag or pillowcase is to sew a zipper to the cut but not sewn parts, and then assemble the product. The zipper should be 5 cm longer than the fastener. Instead of basting, a glue stick for fabrics is also used.
- We apply the markings to the front side of the product.
- Coat the allowance with glue.
- Place the unzipped zipper with the slider down, aligning the spiral with the marking line and press with a hot iron.
To avoid staining the ironing surface, place paper under the part. After this, all that remains is to sew the zipper on the machine and assemble the product.
Seamless circle skirt
- The first step is to mark where you will sew the zipper.
- Carefully cut the fabric to the length of the fastener, adding 5-7 cm.
- We duplicate (glue) the sections with a suitable non-woven tape and overlay the sections.
- We sew in the zipper.
- We close the rest of the incision with a suture.
Dress
If the clasp on a dress starts below the neckline or armhole, the seam is sewn down in advance before the clasp begins to be released. We carefully combine the details along the waistline, especially in cut-off dresses.
Important! If the fabric is cut on the bias or the cut is curved, duplicate the allowances with non-woven tape. We do the same with thin and knitted (stretchy) fabrics.
How to sew a zipper into the side seam of a dress cut at the waist - video
Sewing a hidden zipper into any product is not so difficult if you know some tricks and secrets. Guided by the described recommendations, everyone can do this without difficulty.
A hidden zipper is indispensable when you need a fastener that is invisible from the front side for a dress, skirt, or bag. It is not so easy to sew it in correctly without deforming the product. What do you need to know to sew a hidden zipper?
Features of a hidden zipper
The peculiarity of a hidden zipper is that it is hidden in the seam of the product, and only the slider remains on the surface. In the regular one it is located on the side of the teeth, in the secret one - on the reverse side. But don’t be confused, some regular zippers also have teeth hidden under the braid. You can distinguish it this way: in a hidden zipper, when open, the teeth are easy to bend, in other types - not.
The difference between a hidden zipper is that the teeth are on the inside
How to choose the right hidden zipper? Pay attention to the width, type and density of the base material. The lighter the fabric of the product, the thinner the zipper is chosen. The length should be 2-3 cm longer than the planned length of the fastener.
Iron the zipper before working. If it is on a cotton ribbon, this is done with steam. The fact is that the zipper tape can stretch or shrink and wrinkle the fabric in the finished product.
“Hidden” foot for stitching
To sew a hidden zipper, a special foot is used, which allows it to be stitched as close to the teeth as possible. It is not always included with the sewing machine, but is sold in specialized stores. It differs from the usual one in the shape of the sole: on the surface of the product there are grooves or grooves for the zipper spiral.
To choose the right presser foot, take with you to the store any one that is suitable for your sewing machine. The paws of different models have design features:
- on the “leg”;
- with removable sole;
- with screw fastening.
They can also be metal or plastic. Metal models will last longer. Plastic is a less durable material. Over time, such a foot is deformed by the needle or the teeth of the machine bar, and its sliding deteriorates. But if the foot is needed for one-time work, then a plastic product will do.

There are two types of claws for hidden zippers - plastic and metal
What do you need for work
To sew a zipper you will need:
- zipper;
- chalk
- ruler;
- tailor's pins;
- needle and thread;
- "secret" foot.
Before starting work, check the tension of the upper and lower threads in the machine. If it is strong, then loosen it, otherwise after stitching the zipper will bristle.
Do not use needles and threads that are too thick for stitching.
Non-woven strips
It is not difficult to sew a zipper so as not to stretch the fabric. It is necessary to glue the seam allowances in the place where the zipper is inserted using non-woven strips. For this purpose are intended:
- formband - oblique non-woven tape with a central stitch, which is used on oblique cuts or for knitwear and is glued so that the central line coincides with the seam markings;
- contentband - a non-woven adhesive strip, cut in a straight line, which is glued beyond the seam markings by 1 mm.
If there is no formband or contenband, strips are cut from non-woven fabric: for oblique cuts and knitwear on the bias, for straight ones - in a straight line.

Formband - bias binding with a central loop stitch
How to properly sew a hidden zipper
To sew in a hidden zipper, a series of sequential steps are performed.
The first stage is preparation
- Measure from the inside 1.5 cm from the cut of the fabric and draw a chalk line on both sides.
- Glue strips of non-woven fabric - formband or contenband - to the seam allowances at the stitching site. If the fabric is rough and dense, you can do without interlining.
- Baste the seam along the markings.
- Seal the edges with an overlocker or by hand.
- Iron the seam. In this case, first iron the seam on one side, and then iron it on opposite sides.
Second stage - basting
- Place the closed zipper in the center to the stitching site, make chalk marks on the seam allowances and the zipper tape symmetrically on both sides in two or three places. You will need them to sew the zipper more accurately. The top of the fastener should line up with the top seam mark for the waistband for the skirt or neckline if it's a dress.
- Insert pins along the marks across the fastener and fasten the zipper with the seam allowances under the teeth.
- Baste the zipper over the seam allowances, piercing only one layer of fabric.
- Remove the pins, remove the seam basting, and open the zipper.

We apply the markings symmetrically on both parts
The third stage - stitching
- Sew the zipper on the machine using a special foot until it rests on the fastener. If there is no special foot, use a regular one. Then you need to manually bend the zipper spiral and make sure that the seam goes as close to the spiral as possible without damaging it. If you have little experience, then it is better to attach both sides from above to prevent distortion.
- Close the zipper and make sure everything is done correctly.
- Continue the side seam so that the bottom bartack is not visible. It should be 0.5-0.7 cm below the end of the seam.
- Remove basting.

Using a special foot, a hidden zipper is sewn in
How to sew in a hidden zipper - video
Features of sewing in a hidden zipper
Depending on the specific product, fabric, cut and place of stitching, there are some nuances. Below are different options for sewing in a zipper.
Bag, pillowcase
The easiest way to sew a zipper into a bag or pillowcase is to sew a zipper to the cut but not sewn parts, and then assemble the product. The zipper should be 5 cm longer than the fastener. Instead of basting, a glue stick for fabrics is also used.
- We apply the markings to the front side of the product.
- Coat the allowance with glue.
- Place the unzipped zipper with the slider down, aligning the spiral with the marking line and press with a hot iron.
To avoid staining the ironing surface, place paper under the part. After this, all that remains is to sew the zipper on the machine and assemble the product.
Seamless circle skirt
- The first step is to mark where you will sew the zipper.
- Carefully cut the fabric to the length of the fastener, adding 5-7 cm.
- We duplicate (glue) the sections with a suitable non-woven tape and overlay the sections.
- We sew in the zipper.
- We close the rest of the incision with a suture.
Dress
If the clasp on a dress starts below the neckline or armhole, the seam is sewn down in advance before the clasp begins to be released. We carefully combine the details along the waistline, especially in cut-off dresses.
Important! If the fabric is cut on the bias or the cut is curved, duplicate the allowances with non-woven tape. We do the same with thin and knitted (stretchy) fabrics.
How to sew a zipper into the side seam of a dress cut at the waist - video
Sewing a hidden zipper into any product is not so difficult if you know some tricks and secrets. Guided by the described recommendations, everyone can do this without difficulty.
Hello! My name is Irina, I am 48 years old. (7 votes, average: 4.4 out of 5)


