Knitting clothes is a way to express your creativity. The knitting process itself is fascinating both for the little doll owner and for the mother, who helps create a beautiful outfit. Knitting gives you the opportunity to try yourself as a designer, cutter, fashion designer, knitter. And a joint discussion of a new outfit with a child gives the mother a chance to better care for her little daughter and have a fun, useful time.
The process of creating clothes for a doll is a new experience. Using knitting needles and crochet, you can make small copies of fashionable clothes.


For beginner knitters, the process of making clothes for toys helps them master new knitting techniques, consolidate the skills of knitting various elements - elastic bands, garter stitch, creating patterns.


Video on how to knit clothes for dolls
Creating outfits for toys yourself is a fascinating, interesting, creative process, but you need to adhere to specific stages of work and be able to create patterns correctly. To do this, you can take advantage of master classes shared by knitting lovers on the Internet.
Instructions on how to knit clothes for dolls

How to knit clothes for toys correctly:
- Choose necessary materials and tools. To create an outfit for a doll, you can use leftover yarn from any yarn you have at home.
- Make a pattern of the chosen outfit. To do this, wrap the doll in foil and cut off the required piece of material. Then carefully straighten the foil and transfer it to paper. On paper you need to make a pattern for the top and trousers. Based on these drawings, you can make other outfits for the toy.
- To find out how many stitches you need to cast on, it is better to knit a sample from the selected yarn. The width of the sample is divided by the number of loops cast on. This way you can find out how many loops fit in one centimeter. And then you should multiply the number of loops per 1 cm by the required measurements.
- Then we move directly to the knitting process. You need to cast on the number of loops you have calculated and knit the product to the required size. As necessary, according to the pattern, loops are increased or decreased.
- It is better to separately knit all the necessary parts, and then sew them into one. Velcro or hooks can be used as a fastener. On knitted items you don’t have to make separate loops for hooks. Hooks can simply be hooked into a knitted fabric. If there are buttons, then you can simply glue them to the details of the clothing.
- You can knit outfits for dolls either by knitting or crocheting. It is worth remembering that socks and hats are easier to knit on knitting needles. And with the help of a hook you can create non-standard, interesting patterns for decorating an outfit.
- To make the doll's outfit look interesting, it can be decorated with appliqués, beads, and pompoms. But it should be taken into account that for safety reasons, outfits should not contain small, easily torn parts.
How to knit clothes for a Barbie doll, patterns and knitting patterns

Barbie doll is one of the few toys that has been popular with little ladies for many years. Due to her popularity, Barbie constantly appears on store shelves in new outfits. Knitted outfits for Barbie are also varied: evening dresses, wedding dresses, business suits.

That is why many magazines print patterns of knitted outfits for Barbie on their pages. However, when choosing a knitting pattern, you should take into account your real capabilities and skills. If you have good experience creating knitted products, you can choose more complex patterns and designs. If you are just learning to knit, then as your first outfits, to make the experience successful, you should choose simpler knitting accessories: scarves, capes.


How to knit a skirt for Barbie

- To work, you need to choose thin yarn, knitting needles No. 2.5.
- The skirt should be knitted from the bottom. Cast on 36 loops. Next, knit 4 rows with a double elastic band.
- Next we knit according to the chosen pattern. It is better that the pattern is dense and small.
- Using the pattern, we knit the skirt until its length is 8 cm.
- In order to give the skirt shape, you need to decrease the loops. To do this, make bevels: close one loop on each side of the product three times in three rows.
- At the end, a row with holes is knitted, the last row is purl stitches, after which we close the pattern.
- A braid is threaded in a row with holes to gather the skirt at the waist.
- The skirt is sewn together, the seam is made at the back. You can sew the edges not all the way to create a slit in the skirt.
Easy dress option for Barbie

- Cast on the loops according to the pattern (select the number of loops according to the sample).
- We knit the dress with English elastic (alternating knit and purl stitches).
- We knit with the pattern to the required length. Close the pattern.
- The result is a rectangle that is stitched from the wrong side.
- We decorate the finished dress with beads and beads and put it on the doll.
- If desired, you can sew lace or braid to the dress.

How to crochet clothes for a Barbie doll, models and patterns
A crocheted dress for Barbie is a great option to show your creativity and create an original outfit for your favorite doll with your own hands. Difficulties may arise with knitting small parts and decors.

Generally creation crochet dresses are a great opportunity to learn how to knit according to a pattern, master the basic variations of patterns, learn how to connect individual parts into a single whole.
Lung knitted dress for Barbie

- To work, take a hook No. 1.5, acrylic yarn, satin ribbon for decoration.
- Start working on the dress by knitting the bodice. To do this, cast on a chain of 39 air loops. Then make a double crochet in the sixth stitch from the beginning of the row. There should be a loop that will serve as a clasp.
- We knit the second row according to the pattern: 5 double crochets (st. s/n), then you need to make two air loops (v.p.), do not knit 6 loops, then knit 12 double crochets, make three air loops, again do not knit 6 loops, knit 5 tbsp. s/n.

- Row No. 3: make 5 double crochets, then cast on 3 tbsp. s/n on chain stitches, knit 12 double crochets, again cast on 3 double crochets. Complete the row by knitting 5 double crochets. There should be only 28 columns.
- From the fourth to the sixth row, knit according to the pattern of the third row.

- Seventh row: cast on 4 ch, skip one loop without knitting it, make one double crochet, make 1 ch. Knit a whole row according to a given pattern.

- We knit the eighth row according to this pattern: knit 28 double crochets, and instead of the first column, cast on an air loop.
- Ninth row: 2 tbsp are knitted into each loop. s/n, the result is 56 columns.

- From rows 10 to 17, knit according to the same principle as row 9.

- Eighteenth row: knit 1 tbsp. s/n in the first two loops, then cast on three air loops, repeat the sequence. Fasten the thread at the end and cut it.
- Using a needle, sew the back seam up to the eighth row. Sew on a button. Thread a satin ribbon into the hole in the seventh row so that you can adjust the width of the dress.

How to knit clothes for Monster High dolls

A separate series of toys is also at the peak of popularity - Monster High dolls. These dolls are colorful characters that require special outfits. Therefore, when creating images for Monster High dolls, you can safely experiment with colors, unusual decor, and unusual combinations of various elements.


Knitting stages easy crochet summer outfit for the Monster High toy:

- Cast on 16 chain stitches.
- Skip the first loop, from the second loop knit 14 single crochets (st. b/n).
- We make the second and third rows with single crochets. We turn the knitted product. Start the row with an air loop.
- Each new row starts with an air loop. Knit 5 single crochets, turn the knitting and again knit these loops in the opposite direction.
- From the fifth to the twelfth row we knit the product in single crochet columns. The row begins with an air loop.
- From the thirteenth row we form increases on the sides. Start a row with an air loop, then knit for example 4 rows.
- Rows 14-17 are knitted in single crochet columns.
- Top knitted product ready. The skirt itself is knitted with double crochets. Two double crochets are knitted into each edge loop along the bottom of the bodice. Knit 4 rows like this. After this, row 5 is knitted, where a double crochet and a single crochet are alternated.

How to knit clothes for a Baby Bon doll
Baby Bon toys are now very popular among little girls. They liked the fact that they resemble babies, and little ladies like to feel like a real mother.

Knitting outfits for this series of dolls has its own distinctive features. For Baby Bones there is no need to knit complex elegant dresses, they need costumes that real newborn babies wear. Therefore, for this series of dolls they knit vests, overalls, booties, pants, sweaters, simple dresses, hats.

Knitted outfits for these dolls look interesting if you combine knitting and crocheting.

Stages of work and knitting pattern for a dress for Baby Bon

- For work, use hook No. 2, Camellia yarn.
- Knit a dress from the waist down. Cast on a chain of 7 vp. and another air loop for lifting. Knit a single crochet.
- Turn the knitting, knit another row with stitches behind the back loop. Knit 68 rows this way, making a total of 70.

- Connect the edges of the belt with a row of posts.
- Tie a row of half-columns.

- Next, knit a row in single crochet columns. Start and end the row with b/n columns to make 72 loops.
- Next we work with the dress according to the diagram.

- The first row is knitted through two loops. It turns out 12 rapports. This makes 11 rows.

- The edge of the product must be tied with single crochets.
- Tie the last row with a row of half-columns. After this, cut the thread and thread it.

- Attach the thread to the top of the belt, then make a row of half-columns.

- Knit another row in single crochets.
- Then knit in rows according to the pattern.

- Knit 3 rows in rotating rows. There should be a gap of 2 loops on the back, which will be used for the fastener.

- Next, the right side of the back is knitted according to the given pattern.

- To make a lift, replace double crochets with three chain stitches.
- We knit until the right side of the back is completely knitted. After this, cut the thread and fasten.

- Let's move on to the left side. To do this, attach the thread. Knitting the left side will start from the wrong side.
- The left part is knitted according to the same pattern as the right.

- Let's start knitting a yoke according to the pattern.

- After this, process the neckline and fasteners in the same way as the armhole was processed.
- If desired, the dress can be decorated with knitted flowers.
How to knit warm clothes for dolls, models and patterns

You can knit warm clothes for dolls using knitting needles or a crochet hook.

One of the simplest options for knitting a warm thing for a toy is to knit a poncho. Poncho without neck - ideal option an outfit that even a novice craftsman can knit.
If you look at a poncho, it is simply two rectangular knitted fabrics that are later joined into one piece.

Poncho without neck for Barbie

- For work, choose knitting needles No. 3, not too dense threads ( good option there will be threads with a thickness of 220-280 meters per 100 grams). For knitting, you can use mohair threads, wool, or whatever leftover yarn is available. If you use threads of two colors, the poncho will look much more interesting.
- We knit two fabrics separately. For the first fabric, we cast on 18 loops, then we knit 50 rows with facial loops. The result is a fabric that has a garter stitch pattern.

- If you use two threads, then you need to knit two rows in one color, two in another.

- Remove the finished fabric onto a pin. Do not cut the black threads, but cut the red thread and fix the tip on the wrong side.
- Knit the second fabric in the same way as the first. On the left edge side you need to cast on 18 loops. The position of the first canvas will be the front side.
- Count 18 edge holes along the left edge. Start casting on stitches from the center to the edge of the fabric.
- Leave a small piece of thread (about 30 cm). Cast on loops with black thread.

- Next, knit a row with black threads, using the piece of thread (30 cm) that was left. We knit the fabric with purl loops.

- We knit the second fabric until both parts of the poncho are the same in size.
- To close the last row of the second fabric, we knit two loops together, put the remaining loop on the left knitting needle and again knit two loops together.
- Next, remove the loops of the first fabric from the pin.
- Using a knitting needle, we thread the open loops into the edge holes of the second fabric. The knitting needle with loops should be on the wrong side.
- Close all the loops following the example of closing the loops of the second fabric.

- Between the two parts of the poncho there was a hole for the neck. Its edges are neat, so there is no need to further process the neckline.

- You can decorate the bottom of the poncho with fringe.
Home favorite doll in a new outfit created by with my own hands or with the help of mom, will please the little doll owner. The very process of creating an outfit will save money, and will give many pleasant memories, and will help the mother get to know her child better, as well as spend time together doing a common activity.

This kit for a baby doll is knitted very simply and quickly, perfect for beginners. The yarn consumption is very small - only 50 grams of blue thread and a little white thread were used.
We will need:
-acrylic yarn blue color 225m./50 gr.,
-remains of white yarn 225m./50g.
- knitting needles 5 pcs. No. 4.5
-hooks No. 1,5 and No. 3
-needle
- buttons 5 pcs.
Overalls
We begin to knit panties, on knitting needles No. 4.5 we cast on 40 loops with blue threads, distribute them into 10 loops on 4 knitting needles and knit in circular knitting with an elastic band 1 * 1 4 rows.


Take the first pant leg, cast on 6 more stitches, then take the second one
pant leg and also cast on 6 loops. Now we have 92 loops on 4 knitting needles, we continue to knit in circular rows with facial loops 16
rows.  Next we knit in forward and reverse order. The last 6 loops (on both sides) are knitted (plank), and the rest in the front rows are knit stitches, in the purl rows are purl stitches. So we knit 18 rows (don’t forget to make holes in the placket on one side for buttons - edge, 2 knit stitches, bind off 2 loops, knit stitch, cast on closed loops again in the next row).
  For the armholes, we divide our knitting into fronts and back and knit each part separately with 2 knitting needles.

Having knitted 35 rows from the beginning of the bar, we close 10 loops on the shelves, then in every 2nd row there are 3,2,1 loops. We knit 3 rows of the remaining shoulder loops, cast off 10 shoulder loops. So we knit 2 shelves. We knit the back in the same way
We just knit 4 rows more, and only then close off the loops for the neckline - 14 medium ones, and in the next row 3 loops on both sides. We finish each side separately - knit 3 more rows and bind off 10 shoulder loops.

Sleeves (2 pieces)
We cast on 30 loops on the knitting needles and knit 4 rows using 2 knitting needles in forward and reverse order with a 1*1 elastic band. And then another 8 rows (front rows - front loops, purl rows - purl loops). We close 30 loops, break the thread, leaving a tail for sewing in the sleeve.


Assembly
Sew the shoulder loops on both sides. Sew the sleeve loops and sew the sleeves in place. We tie the neckline with crochet number 3 sc and make a button loop.
We make a seam on the inside of the placket and sew on the buttons.
Our overalls are ready!

I had some blue thread left and decided to add booties and a hat to our overalls.
cap
We crochet the bottom with 1.5 white yarn - cast on 6 ch. and close the circle.
1.3 ch rise, 11 dc in circle,
2.5 ch of raising the row, 11 dc after 2 ch - to the end of the row;
3.3 in p of raising the row, 1 dc in the same loop 2 ch, then in each dc of the previous row 2 dc, 2 ch - to the end of the row;
4.5 ch of raising the row, in each in dc-dc, 2 in p - to the end of the row;
5. row we knit as 4,

6.3 in p of lifting row, 1 dc in the same loop, 2 ch, * 1 dc in 1 in dc of the previous row, 2 ch, 2 dc in the next dc of the previous row, 2 in p * to the end of the row;
7. 5 ch, dc, 2 ch, repeat alternating dc and 2 ch.
We knit rows similar to row No. 7 until the height is sufficient. We break the thread.

Using blue thread, crochet number 3, tie 4 rows of sc, break the thread, remove the tail.

Booties (2 pieces)
Using blue thread, crochet number 1.5, we knit the sole. We knit a chain of 10 ch plus 3 ch rises.
5 dc, 4 dc, 5 dc in the last loop, 4 dc, 5 dc, 4 dc in the last loop.
3 ch rise, dc in the same base loop, 9 dc, 5 times 2 dc in the dc of the previous row, 9 dc, 4 times 2 dc in the dc of the previous row.

In the next row, 3 ch rise, dc in the same base loop, then knit in a circle dc, at the ends where we doubled dc, now alternate, dc and 2 dc in one loop, i.e. double through 1. Break the thread.


We attach a white thread and knit 1 row behind the back walls of the sc.
We knit 4 more rows of sc.

We find the middle of the toe and knit evenly on both sides of it 6 times 3 dc with 1 vertex, we knit all other loops of this row with sc.
In the next row, on the toe loops we knit 7 dc with 1 vertex, and the remaining loops of the row are sc.
We knit 1 row with holes (alternating 2 dc with 1 ch).
We tie booties 1 next to the crayfish step.

We knit the second bootie in the same way.
We decorate the booties at our own discretion, I sewed flowers.

We dress our doll and we can start playing!


Evgenia Smirnova
To send light into the depths of the human heart - this is the purpose of the artist
Content
Having appeared on the market, the interactive toy from Zapf Creation created a complete sensation. This is not a simple doll that girls play with. The plastic baby performs the actions of a real newborn baby: cries, laughs, satisfies physiological needs. Children play with Baby Bon, carry them in slings and kangaroo backpacks, push them in strollers, and mothers sew clothes for the doll.
How to make clothes for Baby Bon

In fact, doll things are not much different from ordinary children's things, with the exception of size. A wardrobe for Baby Bon can be created from natural fabric, acrylic, manually or using a sewing machine. In addition, knitting lovers make warm hats and other items of clothing for the baby doll. The craftswomen take Baby Bon's measurements, adjust the patterns to fit, cut the fabric, and sew it according to the pattern. It is important to approach the creation of clothes with care, as if you were sewing them for a real baby, then the products will turn out beautiful.
Where to find clothing patterns for Baby Bon
The Internet is full of instructions for any craft, including sewing. In addition to the Network, the schemes are presented in printed publications. It’s easy to find how to sew clothes for Baby Bon using patterns on the World Wide Web. Among the good publications, pay attention to this: the book by Venus Dodge - it contains patterns for doll things that can be easily adapted for Baby Bon. All that remains is to use the prepared markings to cut out a piece of the required size from the fabric and sweep it away. When will the product be purchased? finished look, you will need to process the edges and get rid of protruding threads.
Openwork dress with shoes
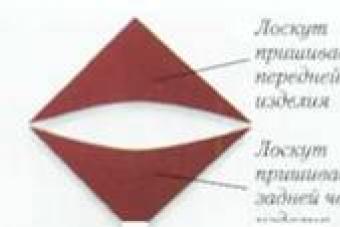
Clothes for dolls are knitted with your own hands, just like for babies, very carefully and with a creative approach to combining colors. A baby doll girl can knit a huge number of dresses, demonstrating all her talent as a needlewoman. Openwork crochet using double crochets and repeats will give the product lightness and airiness. The diagram presented (Scheme 1) shows a method of knitting in one piece without any seams.
Many girls have their favorite baby booms - famous dolls in the shape of babies. They are wildly popular. But what to do when a child asks new suit for a doll, but in stores they are not always of high quality? The solution is simple - make your own baby clothes. Several simple options for creating such clothes can be found here.
To sew clothes for a doll, you need threads, needles, a little imagination, fabric and sewing machine, although in its absence you can sew by hand. To make your homemade baby clothes more realistic, you can use old T-shirts, dresses, scraps, and various leftovers from sewing. However, many people prefer knitted clothes, then you need to use yarn, knitting needles or a hook, and a needle is also useful for knitting doll clothes.
Skirt
First you need to choose a fabric, take measurements from the doll of the half-circumference of the waist and hips, and the length of the product. You need to add 1 centimeter to the length of the skirt for processing. It is advisable to make the width of the skirt twice as large as the waist circumference in order to create beautiful folds.
Then you need to make a yoke pattern. Half waist circumference plus 1-2 centimeters for convenience - the width of the upper part of the belt, half hip circumference - the bottom. The increases are indicated, the lines of the resulting trapezoid are rounded so that the pattern looks like an arc curved downwards.
Next, you should cut out the resulting strip of fabric, sew the bottom edge of the skirt with a hem seam, cut out two parts of the yoke, and iron them. Carefully fold the pleats at the base of the skirt and pin them. You need to connect the parts of the belt, then sew folds to them. All that remains is to trim the edges and insert the elastic. Making blanks  Sew all the ends
  Fold the fabric on each side
  We connect the belt and the base of the skirt
  Tightening the base of the skirt
  Sew on tulle
  We attach the Velcro
Trousers
A simple way out of a situation where you don’t know how to make patterns is to use a ready-made one. Almost all baby booms have the same measurements, so there is no need to take them off several times. From the basic pattern you can make almost any model of pants.
Shoes
You can’t leave your child’s favorite doll without shoes. The most suitable for summer are light sandals. They will require soft faux leather. First you need to make a blank in the form of an insole for baby Bon’s foot, then cut two strips 1.5 centimeters wide, two long ones 2-3 millimeters thick, and several short ones of the same thickness so that you can fasten the sandals on the doll’s foot.
We thread thin strips into wide ones, as shown in the photo. We sew the strips to the sole of the sandals, fasten the backs so that they hold well and do not fall off.
Shoes for baby boomers are made from different materials, such as faux suede or foamiran. But one of the simplest and most understandable ways is to knit booties. Detailed Descriptions Two ways to knit baby clothes with knitting needles can be found in the video below.
 Finished product
To sew a baby jumpsuit, you can use this pattern, which is shown in the figure. You'll have to lengthen it a little. To do this you need to measure your leg length according to inside, and then transfer this value to the pattern to the step line.
When cutting, leave about 1 cm for seam allowance. Next we sew the side and crotch seams, and the middle seam at the back. The front one only needs to be stitched 2 cm, since this model has a zipper on the front. We sew in a zipper. All that remains is to sew on the collar and finish the armholes and bottom of the pants.
Many people prefer to crochet baby clothes. This way you can get a cute and warm thing for the doll, which the child will undoubtedly like. Overalls are one of the most common and comfortable types of clothing. The video presents a detailed master class.
Sundress
To sew a sundress, you can use the finished pattern below, choosing the desired length for the skirt.
You need to cut out two parts - the back and the front. Sew the sundress along the side seams, finishing the armholes with bias tape. You can either make it yourself or buy it in a store. The neckline is also treated with bias tape, but there is no need to trim it - the tape will become ties for the sundress.
Knitting clothes for baby boomers is very interesting and allows you to show your imagination. You can choose bright colors, experiment with patterns, style, use different schemes for knitted clothes.

 Cut out the elements Sew the bottom with a hidden seam
  Making decor
  Sew on the pocket
 Common mistakes
When sewing clothes for a doll, it is important to remember that all details need to be ironed. This is necessary so that the finished clothes fit better on the baby. It is worth paying special attention to this.
What mistakes are most often made when sewing clothes for a baby boy:
- One of the most common mistakes is complex patterns. For example, when using checkered or striped fabric, you need to carefully align the pattern on all the details so that it looks natural;
- When using ready-made patterns, you should carefully transfer everything onto the fabric to avoid annoying mistakes;
- Often, when we knit baby clothes with knitting needles, a situation is possible when the fabric suddenly begins to narrow or expand. This means that the loops were accidentally reduced or added. It is worth counting the number of loops in the rows, and then finding the place where the error occurred. Then dissolve to this point and continue from there;
- In order to carefully knit baby clothes, especially things with openwork pattern, it is advisable to knit another stitch to sew the parts together.
Creativity is a pleasant process in itself, and if it also pleases a little person, it is doubly pleasant. Sewing and knitting is not so difficult, and children will definitely be pleased with the result of their work and will happily dress up Baby Bon in new clothes.
Video
Bikini, swimsuit, cap
Size: 40-45cm = Baby Born
Swimsuit and cap
Material:
Trio SARI (55% cotton, 45% viscose - 145m/50g): 40g. pink, remains of Tahiti melir.
purple beads
1 button, 2 metal rings
Patterns
Edging pattern: alternately *1 front, 1 back*
Knit stitch: face work, knit stitches, back and back stitches
hole pattern:
1 round row: knit stitches
2nd round: repeat, slip 1 stitch, knit 1, put removed stitch on knitted stitch, 1 yarn over.
Round 3: knit stitches
4th circular row: repeat, 1 yarn over, slip 1 loop, knit 1, put the removed stitch on the knitted one
Knitting density:
Using knitting needles No. 3.5, stockinette stitch:
25 loops + 48 rows = 10*10 cm
Swimsuit
Start from the back. Using size 3 needles, pink, cast on 43 stitches. 2 cm with a edging pattern, then knit with needles No. 3.5 in stockinette stitch.
6 cm from the set row on both sides along the face of the work, decrease 16 times by 1 loop (at the beginning of the row, knit 2 loops together with the front one, at the end of the row, knit 1 loop, remove the next loop and put it on the knitted one) = 11 loops.
Knit 6 rows without decreasing.
For the front part on both sides along the face of the work, add 16 times 1 loop = 43 loops
Knit 6 rows straight.
To cut out the sleeves, knit 4 stitches in garter stitch on both sides and decrease 1 stitch on both sides along the face of the work.
Cast off middle 21 sts. There will be 4 loops left on both sides, knit them another 8 cm and close
Sew beads along the top of the front. Close the side seams.
Using Tahiti thread, crochet 2 ropes of 35 cm each and pull them along the cutout of the legs.
Tie the neckline of the sleeves and straps with pink st. without a crochet. Sew a button to the ends of the straps.
Strap
Using double Tahiti thread, crochet a rope 30 cm long, unfold and knit a row of st. without nac.
Sew rings to the strap on both sides. (Pull the strap into the ring, tuck it 1cm through the ring and sew)
Tie a rope of air loops 22 cm long. Connect the rings with it.
cap
Set of knitting needles for socks No. 3. Cast on 72 stitches, knit in the round for 8 circular rows in garter stitch. Then knit 5 cm from the set row with a hole pattern. Then knit in stockinette stitch and in every second row decrease 6th to 0th (reduce 6th = repeat: knit 6 stitches, slip 1, knit 1, put removed stitch on knitted one) Pull off the remaining stitches.
Tie the pink hat in one circular row, st. without nac. and one circular row of picot (= 1 single stitch, 3 chain stitches, 1 single chain stitch in the first chain stitch, skip 1 stitch.)
Bikini
Material
Trio SARI (55% cotton, 45% viscose - 145m/50g): 30g. pink, 15 gr. white.
pink beads
2 buttons
A pair of knitting needles No. 3 and No. 3.5
Set of knitting needles for socks No. 3, hook No. 3
Pearl Pattern:
1 round row: alternately *1 knit, 1 purl*
Round 2: according to pattern
Round 3: alternately * purl 1, knit 1 *
4th circular row: according to the pattern
Garter stitch: knit stitches on all rows
Knitting density:
Using knitting needles No. 3.5, stockinette stitch:
25 loops + 48 rows = 10*10 cm
Panties
Start from the back. Using size 3 knitting needles, pink, cast on 42 stitches. Knit with a pearl pattern.
3.5 cm from the set row on both sides along the face of the work, decrease 16 times by 1 loop (at the beginning of the row, knit 2 loops together with the front one, at the end of the row, knit 1 loop, remove the next loop and put it on the knitted one) = 10 loops.
For the front part on both sides along the face of the work, add 16 times 1 loop = 42 loops.
Knit 3.5 cm straight. Close the loops.
Close the side seams. Tie the edges in pink, 1 st. next to each other. without nac.
Using white, knit a chain of chain stitches 45 cm long and, using a large needle, pull it along the top edge, stepping back from the edge by 0.5 cm, while starting from the middle of the front
Bikini top
Using needles No. 3, pink, cast on 80 stitches. Knit 1.5 cm with a pearl pattern. Then bind off 20 loops, knit 19 loops, bind off 2 loops, knit 19 loops, bind off 20 loops.
Knit the resulting parts of 19 loops separately with a pearl pattern, while in every second row on both sides knit 7 times, 2 loops together = 5 loops. Knit another 10 cm in garter stitch. Close the loops.
Tie the scissor row with white, one row st. without nac. and one row of picot (= 1 single stitch, ch 3, 1 single stitch in the first ch, skip 1 stitch.)
Tie the remaining edges with pink, one row st. without nac.
Along the upper edge from the middle of the back through the straps to the second middle of the back, with white, stepping back 0.5 cm from the edge, knit 1 row of connecting stitch. Sew a bead on every 2nd loop.
Sew buttons on the ends of the straps.