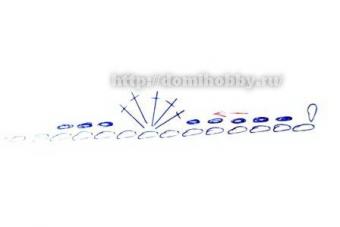
Topiary is a kind of eco-decor that can serve as an excellent element of your interior, as well as an original gift relatives and friends. This craft can be made at any time of the year using various materials. For people who love handicrafts, this word is no longer new. We present to your attention a master class “Topiary from autumn leaves”.

We all know that autumn is very rich in natural materials, and especially in a variety of leaves. But before you start making the “Tree of Happiness” from dry tree leaves, you need to dry the leaves. There are several ways to dry leaves: put them in a book or magazine, the second way is to put the leaf on an ironing board, cover with a sheet of white paper and iron it a little.
This method will dry the leaves much faster than the first, but if you think about it in advance, there will be no problems with this.

Topiaries can be made from maple leaves and even combined - from leaves and cones, acorns.

Tree of Happiness
We present to your attention a master class “Topiary from autumn leaves”. In it you will learn how to make such a miracle for decoration with your own hands.
Before you start work, need to read the materials which we will use in today's master class:
- scissors;
- newspapers, napkins or plain paper;
- glue (super glue, glue gun);
- a wooden stick or pencil (it all depends on the size of your tree);
- container for wood (yogurt cup, pot, bottom of a plastic bottle);
- wide tape;
- dry tree leaves (from maple leaves it will make a good craft);
- gypsum;
- satin ribbons, beads, stones.
Once you have stocked up with everything you need, you can begin work.
Let's prepare the pot for use. After you choose the desired container (it could be a yogurt cup, a pot, the bottom of a plastic bottle), you have the right to decorate it. You can use paint, nail polish to paint the pot, or use ribbons and pebbles to cover the outer surface (you can choose the colors, sizes, shapes of the materials yourself).
When the appearance of our pot is much more attractive than before, we can move on.

Let's prepare the base. As for the base that will hold the tree trunk, here you can choose any mounting mixture (cement-sand mortar, putty, plaster or alabaster) or the same floral foam/foam.
If you prefer the first option, we recommend using alabaster. It is affordable, you can buy it at any building materials store, it is easy to install and does not crack.
Instructions for using alabaster:

To fill 1 container with alabaster you will need about 300-400 g of the mixture and about 1.5 cups of water. Stir the solution for several minutes. As soon as the mixture thickens to the consistency of thick sour cream, pour it into a container, then install the barrel and hold it level for 2-3 minutes. Leave the mixture to dry for 12-24 hours.
If you use gypsum, then its consistency should resemble thick sour cream, and the drying time for such material is 30-35 minutes.
Next, you need to prepare the tree crown itself. You can use plain paper, newspaper and even napkins. You need to crumple the paper so that you get a smooth ball, and to prevent it from unfolding, we will secure it tightly with wide tape. When the crown is ready, you need to make a small hole for the future trunk of our tree.

Preparing dry leaves for decoration. In order to properly secure the leaves to the crown of the tree, we will use a glue gun (working with it requires extreme care).
The leaves can be stacked on top of each other, making all sorts of compositions that your imagination and soul desire. Here are photos that you can use when making wood. You can also add touches such as beads and stones.

The final stage is making the trunk of our tree. You can use any wood stick as a trunk: a strong branch (previously dried), a simple pencil, a knitting needle, sushi sticks or a wooden stick (the height of the trunk may be different, depending on the height of the pot, the diameter of the ball and your wishes about the height of the product). If you don’t like the original appearance of the trunk, then you can wrap it with ribbons, strands, or simply paint it with paint (nail polish).
Topiaries have long become an interior decoration for any style. But autumn topiary always looks more magnificent, more elegant and richer. Why? Because it combines all the gifts of autumn: fruits and berries of trees, leaves and dry twigs. Try making these - topiaries from pine and fir cones.
I present to you a master class on how to make an autumn topiary from pine and fir cones with your own hands.
Topiary made of pine cones
Glue pine cones onto a small diameter ball. Try to press them tightly, then there will be no gaps. The cones are attached to the base using liquid nails or hot glue. Paint the cones with white gouache with the addition of PVA glue to give lightness and delicacy to the composition.
Use acorns with caps, red berries and oak leaves as decoration. You can lightly paint the fruits with golden paint.

The stick should be covered with linen rope, and the container should be wrapped with a piece of burlap. You can decorate with a leaf, an acorn and a berry.

This is what a topiary made from small pine cones looks like.

Topiary made of pine cones
If you glue several spruce cones between pine cones, the topiary acquires texture. Don't forget about oak leaves and fruits, they look amazing on the ball.

Decorate the bottom of the craft pine cone and a couple of acorns.

Topiary with fir cones looks no less presentable.

These trees will become the highlight of any interior. They are also suitable as a souvenir for the hero of any occasion.
Lyudmila Ermakova
Exhibitions on the theme " Autumn fantasies" or "Crafts on the theme - autumn"there is one for every institution. In this regard, I decided with my children (patronage) conduct MK. The case is fascinating and age-appropriate (14 years old) suitable.
This is such a miracle we achieved.
Abstract master class
"Making autumn topiary»
Compiled and conducted: teacher Ermakova L.A.
September 2016
Topiary- originates from ancient times. At that time, shrubs and trees in gardens, aesthetically trimmed into various, whimsical shapes were called topiary. Nowadays topiary is also popular.
Do topiary with your own hands - exciting and interesting activity, which can be useful for decorating a room, balcony or home. Large quantity natural material, a simple technological process and the possibility of quickly obtaining the final result awaken great interest in this type of creativity.
Today we will do topiary - autumn. Any gifts can be used autumn - leaves, grass, driftwood, stones and much more
Stylish autumn topiary made from natural material will look great on the windowsill or in the dining room.
A decorative tree can be made of fabric, natural material, seeds, cones, shells, pebbles, etc. d. Topiary can serve as an imitation of a real plant, or acquire completely fabulous shapes and colors. Dimensions topiary vary from miniature dwarf compositions to the size of large indoor trees.
During production topiary with children we form and develop children's artistic taste, accuracy, attention, hard work and mental activity.
Master The class describes in detail the instructions for making crafts. For this product, it is better to take tree leaves, as they have unexpected colors, as well as spectacular rowan clusters.
For self-execution such materials:
autumn leaves , dry berries and branches, flowers
Wooden stick
Two foam balls
Hot glue gun and glue sticks
Empty flowerpot or flower pot
Alabaster
Manufacturing technology
1. Base.
For your topiary we will make the base - a crown from a newspaper. To do this, you need to crumple the newspaper well, form a crown ball and glue it well (you can use PVA glue, or you can wrap it with construction paper tape.
2. Connecting two bases
To do this, you need to insert the rod into the hole in the crown quite tightly. In order for the newspaper ball to sit tightly on the rod, you should glue it using a heat gun. After this, the pot is filled with plaster. You need to hold the rod in the pot while the plaster hardens. The weight of the pot should be greater than the weight of the crown and stem.
3. Decoration.
When all the details topiary connected into one whole, you need to start decorating, here you will need your imagination and the material you have: tree leaves, flowers or dried flowers, wild apple berries, etc. The decorative container can be decorated with pebbles or satin ribbon. You can glue broken twigs on top of the alabaster into the container using hot glue.
4. If in creation Topiary fresh flowers or twigs with berries were used, be sure to spray regular varnish for hair with strong hold.
Autumn topiary doing it yourself is exciting and interesting, the work does not take a lot of time, and the result of your activities is immediately visible. This creates great mood both for the creator himself and for those who admire or own the work.

Publications on the topic:
Summary of an integrated lesson for children of the senior group on the “Autumn Dream” walk SYNOPSIS of an integrated lesson for children of the senior group on a walk on the theme “Autumn Dream” Program content: - Continue to form.
Summary of educational activities for physical development for children 4–5 years old “Walk in the autumn forest” SUMMARY OF DIRECT EDUCATIONAL ACTIVITIES IN THE EDUCATIONAL FIELD “PHYSICAL DEVELOPMENT” FOR CHILDREN 4-5 YEARS OLD “WALK IN AUTUMN.
Summary of the educational activity of a teacher with children of the preparatory group “A Gift for the Sun. Topiary - tree of happiness" Abstract directly - educational activities teacher with children preparatory group taking into account the integration of educational ones.
Summary of a subgroup speech therapy lesson on literacy “Journey to the Autumn Forest” in the senior group for children with ODD Objectives: Correctional and educational: 1. Expand and activate the vocabulary on the topic “Trees”. 2. Teach children to agree on nouns.
Summary of the lesson “Autumn Kaleidoscope” on the development of speech and cognitive activity of children of senior preschool age State budget educational institution kindergarten No. 23 of the compensating type of the Nevsky district of St. Petersburg Abstract.
Cognitive development: Clarify and systematize children’s ideas about the signs of autumn. To develop an interest in art and observation.
Every year nature gives us a lot of things completely free of charge. natural materials, suitable for creativity. The process of creating with your own hands develops the child’s artistic taste, thinking, memory, and fosters perseverance. But the most important thing is that you can have fun and usefully spend time with friends, delighting yourself and others with crafts.
Preparation of natural materials for their further use
Nature is the best artist; she creates natural materials that, in skillful hands, turn into works of art!


Plant materials
Chestnuts
Chestnut fruits have a bright brown color and a shiny surface, so they make excellent DIY crafts from natural materials. The shell of a fresh chestnut is thin and can be easily pierced with an awl. Chestnuts are a fertile material for working with young children themselves. You can make many different dolls.


It is better to store in a cool place in boxes.
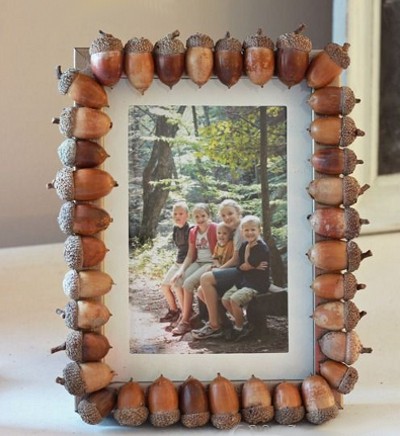
Acorns
Oak fruits ripen in autumn, in September-October. collect various shapes and magnitude.


At the same time, their cups (pluses) on which they rest are also collected. Pluski are very often used separately from acorns, as an independent natural material for various crafts.

Acorn pluses and balls felted from wool
Watch the video to see how to felt even balls of wool. Olga Skibina:

Acorn tops and Christmas bells


You can store them for a very long time, after thoroughly washing and drying them. But why just store stones when the whole family can have fun playing with them?)


For another way to apply images to river or sea stones, see the video from You Can Do It Craft. You'll be surprised how easy it is!
Shells
You can collect shells on the banks of rivers, seas, and lakes while relaxing with your children. Many of them are original appearance, in shape - oval, scallop-shaped, elongated, etc.
Boil them for a few minutes to free them from living organisms. The shells are washed with a small brush (or a toothbrush), after which they are dried and sorted by type and size. Stored at any temperature.
You can also clean shells in a solution of bleach and water at a ratio of 1:1. The top layer will disappear after a while, leaving the shell with a beautiful shiny top.
Animal figures are made from large shells.
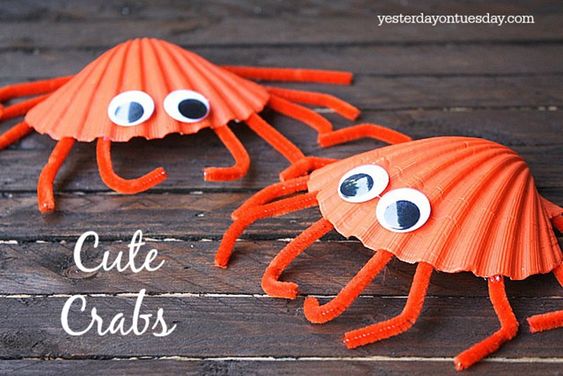
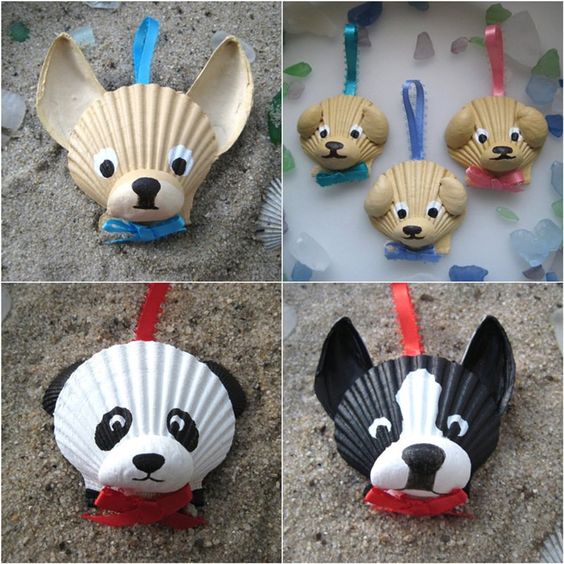

Small shells make wonderful applications and garlands:

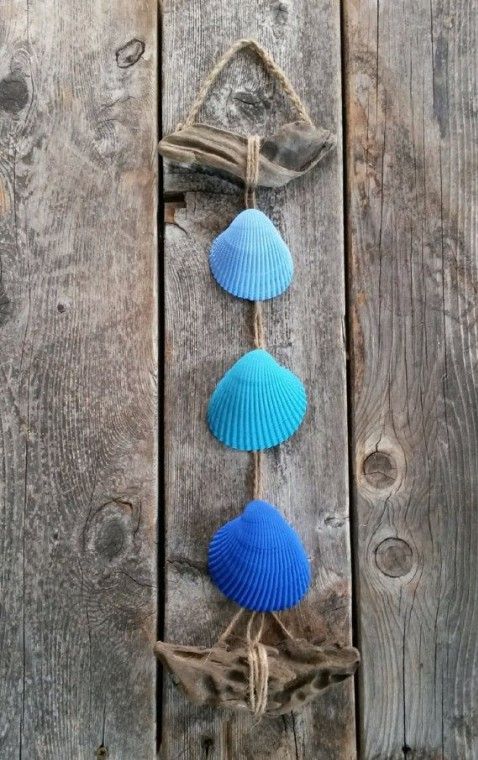
Shells can be used not only as the main material, but also as additional decoration (bird wings, dog ears, flower petals, etc.)


Sand
Very accessible material that can be collected in any sandbox. It varies in structure. Before use, it must be rinsed and dried thoroughly. And then you can use it as decoration in your works:


Rules for storing natural materials
DIY crafts made from natural materials will be flawless if, after collecting, drying, and pre-processing, you properly store these natural gifts. To do this, you must adhere to certain rules.
- A dark, cool and well-ventilated room is best place for storing natural materials.
- You can buy plastic containers for storing each type of material; use cardboard boxes from under shoes, tea, sweets; take ordinary glass jars with a screw cap. For seeds, as for beads, it is better to have a container with many compartments.
- Dried flowers are fragile and break easily, so they are placed in a tight box or container. Petals are stored separately from flowers. Flowers with stems can be stored in a vase.
- Prepared leaves are also brittle. You can store them in big books. Also, for safety, put them in labeled candy boxes, secure them with a little tape so that they don’t accidentally open.
- The shells are placed in glass jars or plastic containers with a wide mouth to prevent them from crumbling.
Additional tools for crafts made from natural materials
To create beautiful craft made from natural materials, you will need additional tools and materials.

These could be:
- colored paper;
- cardboard;
- leather scraps;
- scraps of fabric;
- bird feathers;
- foam;
- plasticine;
- wire;
- PVA glue, “Moment”;
- gouache;
- stain;
- varnish, etc.
Paper very often used as a complement to natural materials. Children, bending and gluing it, make the work much more interesting.
Plasticine fasten individual parts of simple toys at the initial stage of work. It is not very durable, but as an addition it is often used in kindergarten and elementary school.

From wire most often the frame of a toy is made, the connection of its parts. Copper wire diameter 0.29-0.35 mm - soft, flexible and durable - most comfortable. And for the frame, wire of a larger diameter is used - 1-1.5 mm.
Threads It’s better to take thick, multi-colored ones (No. 10).
Glue it is better to take white PVA, BF, etc. However, in kindergarten it is better to use PVA glue.
They also use foil, pebbles, cherry pits, and bristles.
It is better to store additional material in a small box with compartments for each type of material.
The use of additional material depends on the plan, the skill of the children, and the degree of development of imagination! Offer your options, but rely more on children's intuition and desire.

It is also additionally necessary to have certain tools for making crafts from natural materials:
- art scissors;
- awl;
- jigsaw;
- tweezers;
- pliers and wire cutters;
- sewing needles;
- brushes for glue and paints;
- a cotton cloth for wiping off glue residue.
Scissors for children, they should have blunt ends, small, with rings that are comfortable for a child’s hand.
Awl must be made of durable material with a handle length of about 6 cm, a diameter of about 2 cm, the piercing part is 3.5 cm
Needle I need a large sewing machine. Be sure to store it in a pincushion with a thread threaded into it.
Attention! Only adults use pliers, pliers, and drills!
To draw the outline of the part to be cut out, a simple pencil. For example, a dress, hats for a doll, etc. It is better to take a soft pencil (2M).
Tassels(soft for drawing, harder for glue). It is better to buy squirrel tassels (No. 4 and 6). For glue, use brushes with hard bristles.
Stack- a tool necessary for processing a surface made of clay or plasticine. The length of the stack for children is about 12 cm. You can make the stack yourself from a worn-out brush: round it on one side and sharpen it on the other.
Crafts made from natural materials for kindergarten
Kids love it when in their hands chestnuts and plasticine turn into toys that they can play with. Crafts made from natural materials for kindergarten are not very complicated, so any child can do it with the help of an adult. Sometimes they are made from fruits and vegetables, but most often they are applications from leaves and animals from cones and acorns.
Crafts from leaves and maple “helicopters”
The easiest and most accessible job, even for kids, is leaf applique. If this is your first time making a composition with your child, offer him a picture that will serve as a template. Don't rush to do everything yourself. Invite your child to choose leaves as desired so that the work turns out similar to the sample. This is how they will develop creativity your child.
Material for application:
- colorful leaves;
- thick sheet A-4;
- glue brushes;
- PVA glue;
- scissors;
- sample.
To make a simple arrangement, you need even, dry leaves. Place them under a press or in a book. In two days the material is ready. Cut out the appropriate pieces with scissors and lay them out on a sheet of paper.
Now you can glue it. First the background and lower layers, and then the finer details. For example, if you want to make an elephant, then first make a body and head out of leaves, and then glue on the trunk, tail, and legs. If you don’t have enough eyes, you can add them in with a marker or make them from tree seeds.

You don't have to do everything according to a template. You can come up with a picture yourself and create an original composition from leaves.


Use as a supplement colored paper, felt-tip pens, paints, so your applications will be even more interesting.
Along with leaves, maple “helicopters” are also ideal as a basis for crafts made from natural materials for kindergarten. Just look at this miracle!

Fairy wings made from maple seeds

Dragonflies from maple "helicopters"
Now you have seen how beautiful and original leaf applications can be. Use these ideas for spending time with your children.
Simple master classes on creating children's crafts from acorns and cones
At the end of summer, acorns begin to ripen, and they make wonderful crafts from natural materials for kindergarten or school. They are well preserved, and on long autumn evenings, together with your children, you can do a pleasant and useful activity that develops fine motor skills baby's hands, imagination and perseverance.
The most common crafts made from acorns are little animals and various people. You can easily make legs, arms, horns and other small elements from toothpicks, matches, thin twigs. An adult needs to help the children poke holes in the acorns.
To attach small parts, you can use a glue gun or Super Moment glue, but only adults should do this. And the safest way for children to fasten parts together is with plasticine.

Making fly agarics from acorns is even easier! To paint acorns, you need to remove the caps from them, and after the paint has dried, glue them in place.


Acorns are very beautiful on their own, and if you paint them too acrylic paints or nail polish, such crafts will decorate any home.

You can also make hats painted with silver paint original decoration on Christmas tree. The process of creating such an eco-toy is quite simple: we tightly glue acorn caps onto a foam ball (you can take an old Christmas tree ball). And it sparkled new.

We found another video for you, where Niki Junior
In addition to “edible” crafts, kids can choose any of the ones presented in this huge Krestika article! We tried to choose the best and easiest to implement ideas :) Good luck and creative inspiration to everyone!
The autumn topiary for the Golden Hands kindergarten was almost entirely made by Artem Tikhonov (under the strict guidance of his mother). The idea is so simple and clear that it will be very easy for a 5-7 year old child to make a topiary with their own hands with minimal adult intervention, of course. Easily available natural materials were used: chestnuts, nuts, cones, acorns, shells.
Used homemade paper ball wrapped with twine. A styrofoam ball would also work diameter 8 cm.
The total height of the decorative tree is 26 cm, pot - 6 cm, crown diameter with decor - 14 cm. All you need to make children's crafts of this size is 2-3 hours.
Materials for topiary for kindergarten “Golden Hands”

To make an autumn topiary for the kindergarten you will need:
- Dried chestnuts.
- Walnuts (halved).
- Acrylic paint + bronze (gold).
- Acorns with caps.
- Snail shells.
- Cones of alder and larch.
- Dried flowers.
- Fabric flowers.
- The curved trunk is a branch of Corilus.
- Plastic flower pot.
- Ice cream sticks.
- A ball of paper wrapped with twine.
- Silicone glue sticks for a hot-melt gun (diameter 7 mm, length 20 cm used) - 5 pcs.

Autumn topiary “Magic Glade” with chestnuts, acorns, foam vegetables and sisal balls!✔ .

Video master class - autumn topiary in kindergarten
Comfortable step-by-step master class in excellent FullHD 1080p quality, how to make an autumn topiary for kindergarten with your own hands.
Step-by-step master class with photos - do-it-yourself autumn topiary for kindergarten

Stage I. Making a ball and decorating a pot
For the autumn children's topiary “Golden Hands”, the easiest way to make a ball for the tree of happiness was chosen - from paper, newspapers and scraps. We increase the mass so that the diameter of the ball is equal to the pot, give it a spherical shape and wrap it with tape, and on top with twine. We fix the barrel in the hole in the ball with glue.
We use any plastic container, for example, a disposable flower pot. We decorate the surface with coffee or ice cream sticks and paint it thickly with bronze acrylic paint.
Stage II. Colorings
We prepare materials for decorating the crown: we paint the shells of the snails with gold acrylic, and the halves of the nuts with orange and, after drying, lightly powdered with gold. In addition, we paint the barrel in 1 layer with chocolate acrylic.
Acrylic-painted elements for the autumn topiary “Golden Hands” dry in no more than 15 minutes.
Stage III. Crown decor
Alternating, we glue large elements onto the crown:
- Dried chestnuts.
- Acorns with and without caps, separately caps.
- Painted nut halves.
- Painted shells.
- Dried cotton flowers.
We seal the entire surface of the ball, and close the small gaps with alder and larch cones. We glue decorative flowers and beige poppies all over the crown.


Stage IV. Autumn tree assembly
We plant the topiary with the finished crown in a pot, fix chestnuts and small shells in layers. Carefully glue each layer. At the base of the autumn topiary “Golden Hands” we glue dried flowers; We also add a few leaves to the crown.
To protect topiary made from natural material from damage by insects, lightly treat the finished tree with any hairspray.
Children's decorative tree “Golden Hands” - photo presentation